Erbauer EAG18-115
Дастури корбарии суфтакунандаи кунҷи бе хасу Erbauer 18V EAG18-Li 115mm
Model: EAG18-115
1. Муқаддима ва Маълумот оид ба бехатарӣ
This manual provides essential information for the safe and efficient operation of your Erbauer 18V Brushless Angle Grinder. Please read all instructions carefully before use to prevent injury and ensure proper tool function. Keep this manual for future reference.
Огоҳӣ оид ба бехатарии умумӣ
- Always wear eye protection, hearing protection, and suitable gloves when operating the grinder.
- Боварӣ ҳосил кунед, ки порчаи корӣ бехатар аст clamped before grinding.
- Дастҳо ва баданро аз диски гардишкунанда дур нигоҳ доред.
- Лавозимоти вайроншуда ё нодурустро истифода набаред.
- Пеш аз танзим кардан, иваз кардани лавозимот ё нигоҳ доштани асбоб, батареяро ҷудо кунед.
2. Қисмҳои маҳсулот
Familiarize yourself with the parts of your Erbauer Angle Grinder:
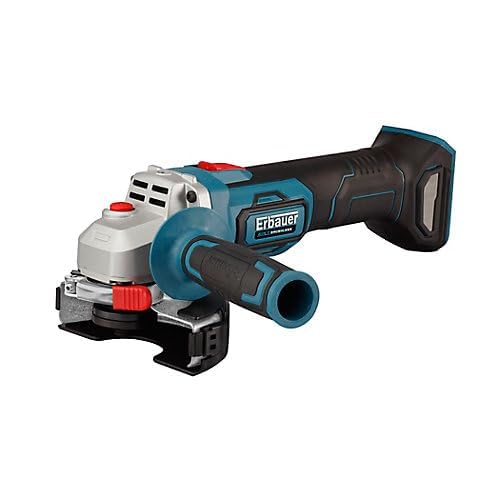
An image showing the Erbauer 18V Brushless Angle Grinder, model EAG18-Li 115mm. The tool is blue and black with a silver head, featuring a red power button and a black and blue side handle attached.
- Бадани суфтакунанда
- Тугмаи қулфи шпиндель
- Гузариш / Хомӯш
- Дастаки тараф
- Гвардияи муҳофизатӣ
- Диски дастос (дохил карда нашудааст)
- Battery Port (battery not included)
3. Насбкунӣ ва васлкунӣ
3.1 Насби батарея
This tool operates with an Erbauer 18V battery pack (sold separately). Ensure the battery is fully charged before use.
- Бастаи батареяро бо порти батарея дар суфтакунак ҳамоҳанг созед.
- Батареяро ба ҷои худ лағжонед, то он даме, ки он бехатар клик кунад.
- Барои хориҷ кардан, тугмаи озодкунии батареяро пахш кунед ва батареяро берун кашед.
3.2 Пайваст кардани дастаки паҳлӯ
The side handle can be attached to either side of the grinder head for optimal control.
- Screw the side handle clockwise into one of the threaded holes on the grinder head until it is tight.
3.3 Installing the Protective Guard
The protective guard must always be used to shield against sparks and debris.
- Муҳофизатро воз кунедampвинт.
- Position the guard to cover the grinding disc and direct sparks away from you.
- Клро пурзӯр кунедampсахт печонед.
3.4 Mounting the Grinding Disc
Use only 115mm diameter grinding or cutting discs rated for the grinder's maximum RPM.
- Тугмаи қулфи шпиндельро пахш карда нигоҳ доред.
- Unscrew the outer flange using the provided spanner.
- Place the grinding disc onto the inner flange, ensuring it sits correctly.
- Screw the outer flange back on and tighten it firmly with the spanner while holding the spindle lock button.
- Тугмаи қулфи шпиндельро озод кунед.
4. Дастурҳои истифодабарӣ
4.1 Фурӯзон/хомӯш кардан
- To turn on: Slide the On/Off switch forward.
- To turn off: Slide the On/Off switch backward to the OFF position.
4.2 Усулҳои майдакунӣ
- Hold the grinder firmly with both hands, one on the main handle and one on the side handle.
- Пеш аз тамос бо қисмати корӣ, ба диск имкон диҳед, ки суръати пурраи корӣ дошта бошад.
- Apply light, even pressure. Do not force the tool, as this can cause kickback or damage the disc.
- Maintain a shallow angle (typically 15-30 degrees) between the disc and the workpiece for grinding. For cutting, use a cutting disc and hold the tool perpendicular to the workpiece.
- Move the grinder smoothly across the surface to ensure an even finish and prevent overheating.
5. Нигоҳдорӣ ва нигоҳдорӣ
5.1 Тозакунӣ
- Пеш аз тоза кардан ҳамеша бастаи батареяро хориҷ кунед.
- Regularly clean the ventilation slots to prevent dust buildup, which can lead to overheating. Use compressed air if available.
- Қисми берунии асбобро бо матои нарм пок кунед, damp матоъ. Моддаҳои кимиёвии сахт ё тозакунандаи абразивиро истифода набаред.
5.2 Нигоҳдорӣ
- Store the grinder in a dry, secure location, out of reach of children.
- Remove the battery pack from the tool before long-term storage.
- Protect the tool from direct sunlight and extreme temperatures.
6. Баррасии мушкилот
| Мушкилот | Сабаби эҳтимолӣ | Ҳалли |
|---|---|---|
| Суфтакунанда оғоз намекунад | Battery not charged; Battery not inserted correctly; On/Off switch not fully engaged. | Charge battery; Reinsert battery securely; Ensure switch is in ON position. |
| Вибрацияи аз ҳад зиёд | Damaged or unbalanced disc; Disc not properly mounted; Loose side handle. | Replace disc; Re-mount disc correctly, ensuring flanges are tight; Tighten side handle. |
| Коркарди камшуда | Battery low; Worn disc; Overheating. | Recharge battery; Replace disc; Allow tool to cool down, clean ventilation slots. |
7. Мушаххасоти техникӣ
- Бренд: Эрбауэр
- Модели: EAG18-115
- Ҷилдиtage: 18 вольт
- Диаметри диск: 115 мм
- Қувва: 72 Ватт
- Мавод: Металл
- Ранги: Кабуд
- ASIN: B0C7JWVC1F
8. Кафолат ва дастгирӣ
This Erbauer product is covered by the manufacturer's standard warranty. For specific warranty terms and conditions, please refer to the documentation provided with your purchase or visit the official Erbauer website. For technical support, spare parts, or service inquiries, please contact Erbauer customer service through their official channels.
Барои маълумоти иловагӣ, шумо метавонед боздид кунед Erbauer brand page on Amazon.
Ask a question about this manual
Ask about setup, troubleshooting, compatibility, parts, safety, or missing instructions. Manuals+ will review the question and use this page’s manual context to help answer it.