
1. Муқаддима
This manual provides comprehensive instructions for the safe and efficient installation, operation, and maintenance of your MOUNT PRO Dual Monitor Desk Mount. Please read this manual thoroughly before installation and retain it for future reference.
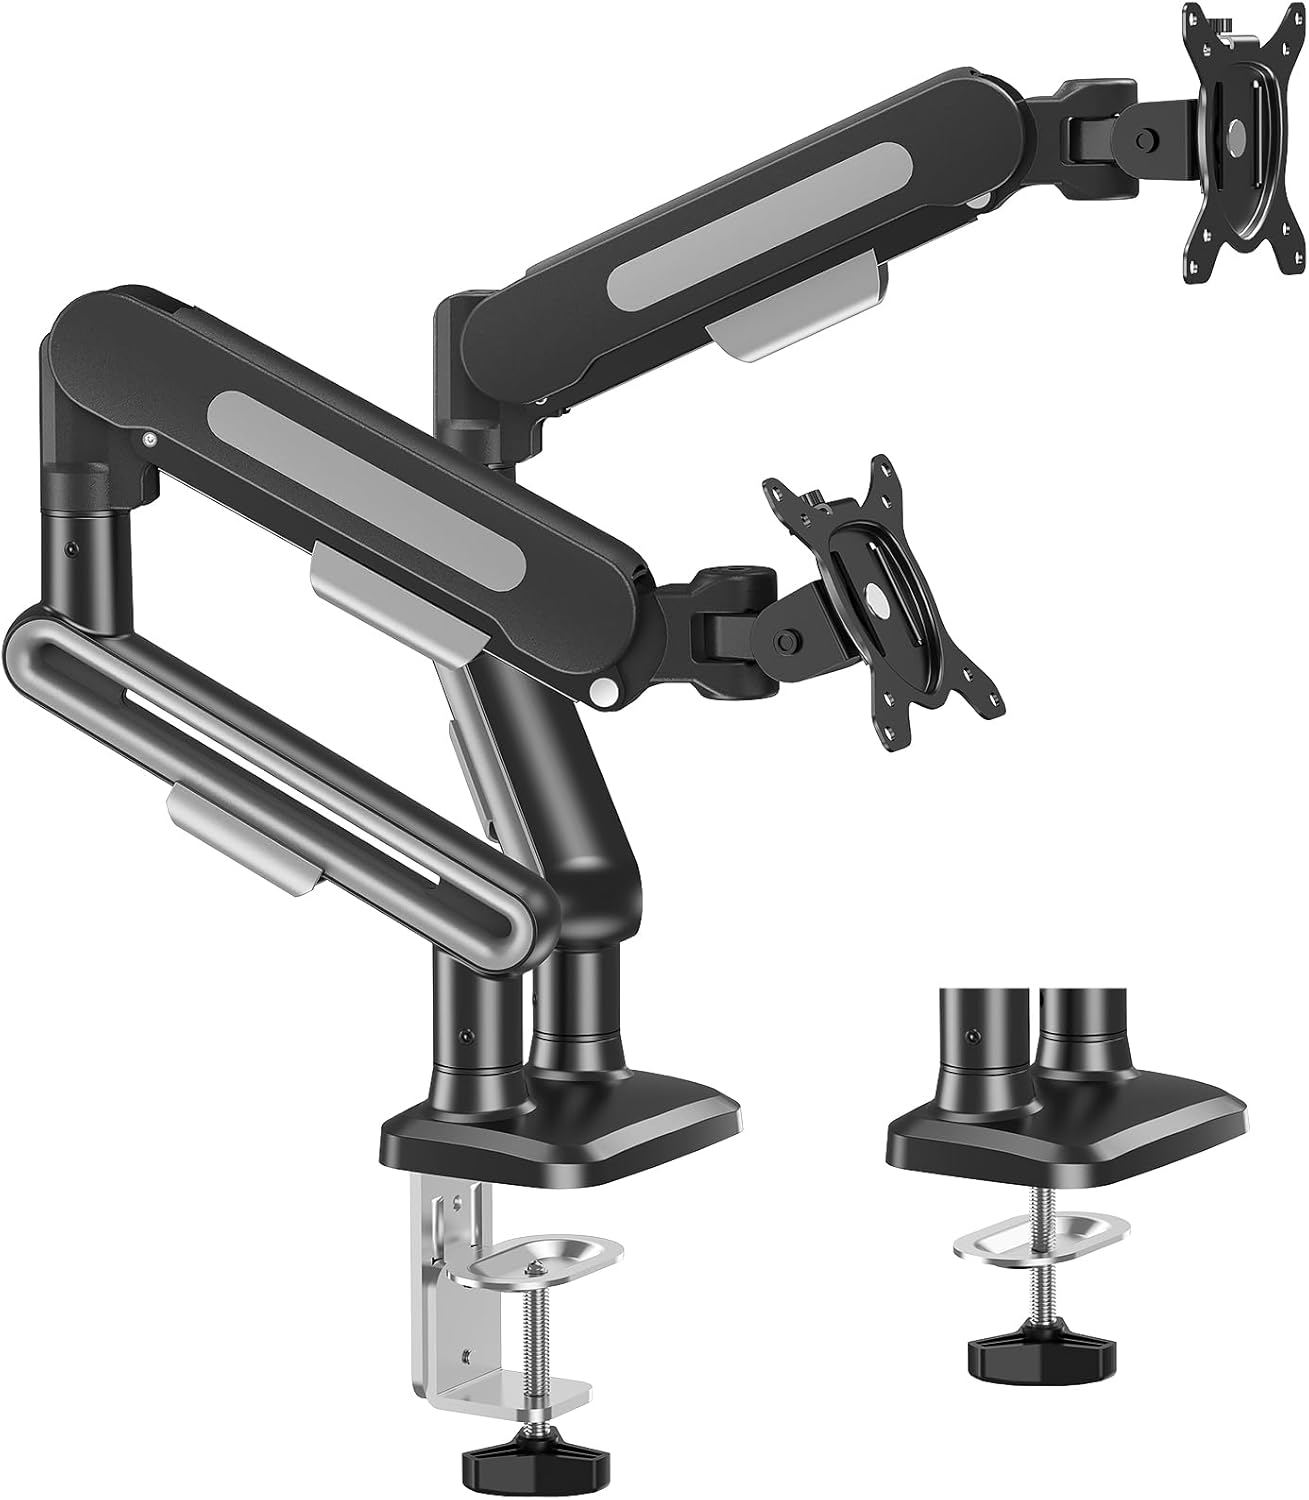
Image 1.1: MOUNT PRO Dual Monitor Desk Mount showing both C-clamp ва имконоти пойгоҳи гулдӯзӣ.
2. Маълумот оид ба бехатарӣ
Always ensure the mounting surface can support the combined weight of the mount and monitors. Do not exceed the maximum weight capacity. Use appropriate tools and follow all installation steps carefully. Keep children and pets away during installation.
3. Мундариҷаи баста
Пеш аз оғози насбкунӣ тасдиқ кунед, ки ҳама ҷузъҳо мавҷуданд:
- Дастакҳои дугонаи монитор (2)
- Desk Mount Base (1)
- C-Clamp Таҷҳизоти васлкунӣ
- Сахтафзори васлкунии гиреҳҳо
- Пластинаҳои VESA (2)
- Асбобҳои васлкунӣ (калидҳои Аллен ва ғ.)
- Дастури дастурӣ
4. Мушаххасоти маҳсулот
| Хусусият | Мушаххасоти |
|---|---|
| Бренд | MOUNT PRO |
| Модели | B0FCM83HFV |
| Мутобиқати андозаи монитор | 22" to 39" (flat or curved LCD/LED/OLED screens) |
| Weight Capacity (per arm) | 4.4 - 26.5 фунт |
| Мутобиқати VESA | 75х75мм, 100х100мм |
| Навъи ҳаракат | Swivel, Tilt, Rotation |
| Кунҷи ҳадди аксар | +75°/-45° |
| Ротатсия | 360° |
| Чарх | 180° (at arm joints) |
| Максимум васеъшавӣ | 22 инч |
| Макс Ҳайт | 18.5 инч |
| C-Clamp Ғафсии мизи корӣ | 0.39 Ба 3.35" |
| Ғафсии мизҳои Grommet | 0.39 Ба 2.76" |
| Диаметри сӯрохи Grommet | 0.39 Ба 2.36" |
| Материал | Металл |
| Ранги | Сиёҳ |

Image 4.1: Key specifications including VESA patterns, screen size, and weight capacity.

Image 4.2: Visual representation of monitor size and weight compatibility.
5. Дастурамал оид ба насб
5.1 Имкониятҳои васлкунӣ
The MOUNT PRO Dual Monitor Desk Mount offers two installation methods: C-clamp and Grommet Base. Choose the method suitable for your desk.
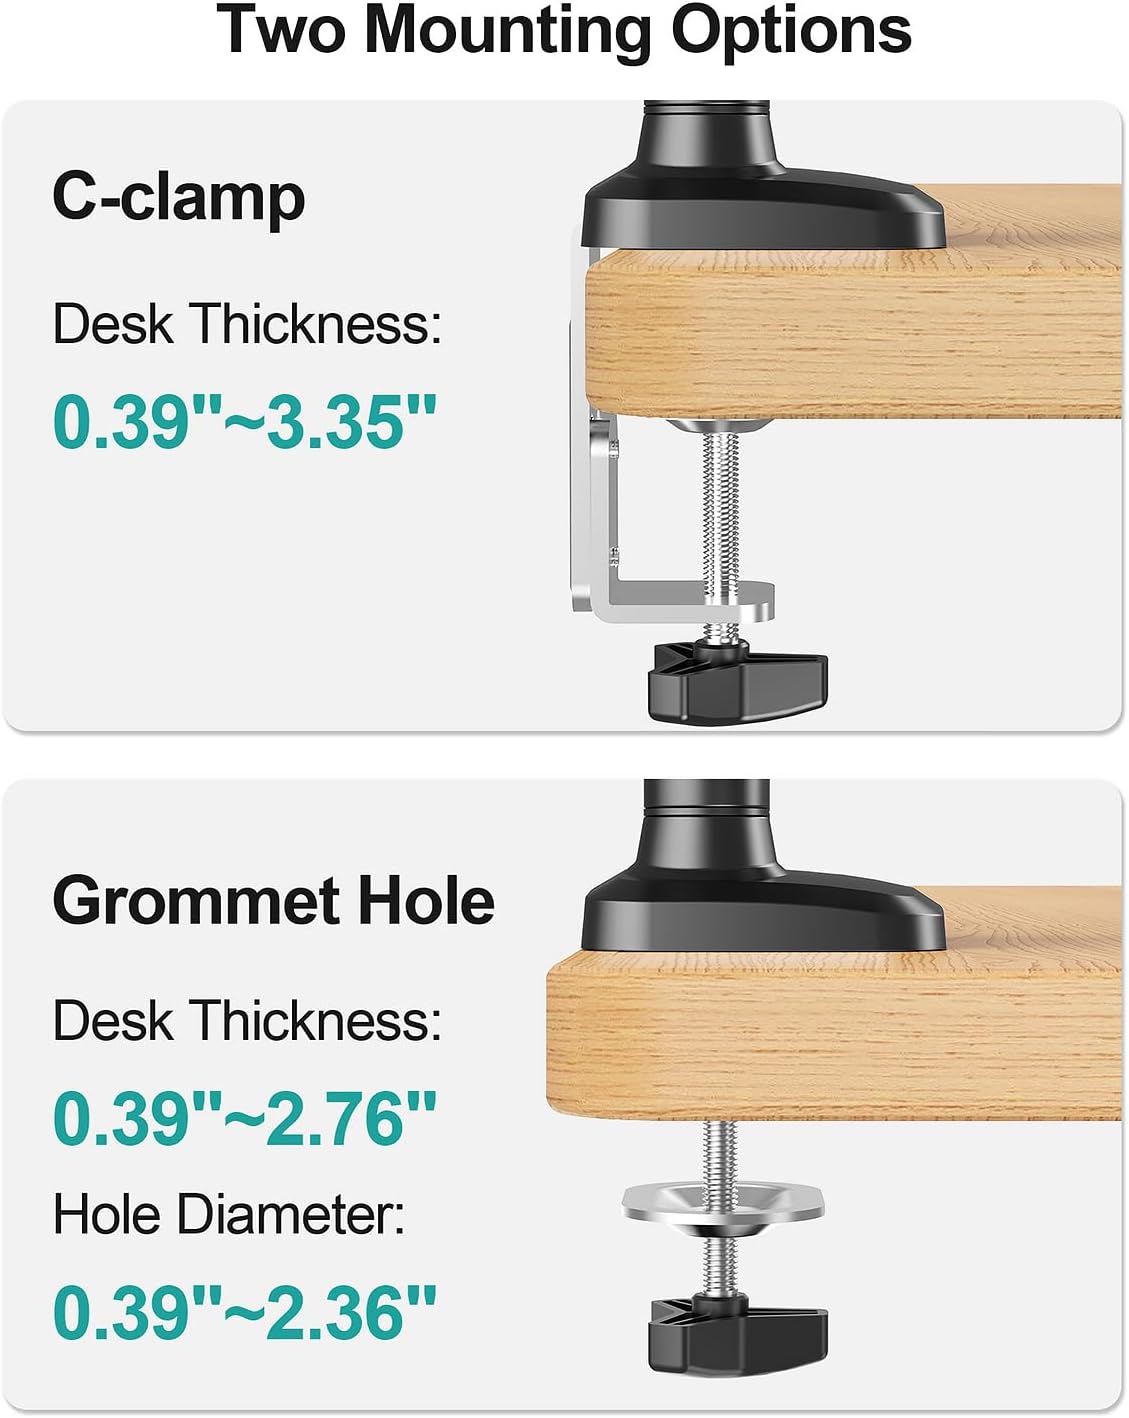
Image 5.1: Visual guide for C-clamp and Grommet mounting, including desk thickness specifications.

Тасвири 5.2: Муфассал view of C-clamp and Grommet Base installation requirements.

Image 5.3: Desk compatibility guidelines for C-clamp насб. Do not install on tempered glass table tops.
5.2 Attaching Monitors (VESA Compatibility)
Ensure your monitors are VESA compatible (75x75mm or 100x100mm). Attach the VESA plates to the back of your monitors using the provided screws.

Image 5.4: Guide to checking VESA compatibility for different monitor types.
5.3 Идоракунии кабел
Utilize the integrated cable management covers on the arms to route and conceal monitor cables for a tidy workspace.

Тасвири 5.5: Мисample of effective cable management using the monitor arm features.
6. Дастурҳои истифодабарӣ
6.1 Танзими мавқеи монитор
The pneumatic arms allow for flexible adjustment of your monitors to achieve optimal ergonomic positioning.
- Танзими баландӣ: Gently push or pull the monitor up or down to your desired height. The gas spring mechanism will hold it in place. Max height is 18.5 inches.
- Васеъ: Extend or retract the arms to bring the monitors closer or further away. Max extension is 22 inches.
- Ҷома: Adjust the monitor tilt (+75°/-45°) for the ideal viewкунҷи дохилӣ.
- Чарх: Swivel the monitors up to 180° at the arm joints to share your display or change orientation.
- Ротатсия: Мониторро барои самти уфуқӣ ё амудӣ 360° гардонед.
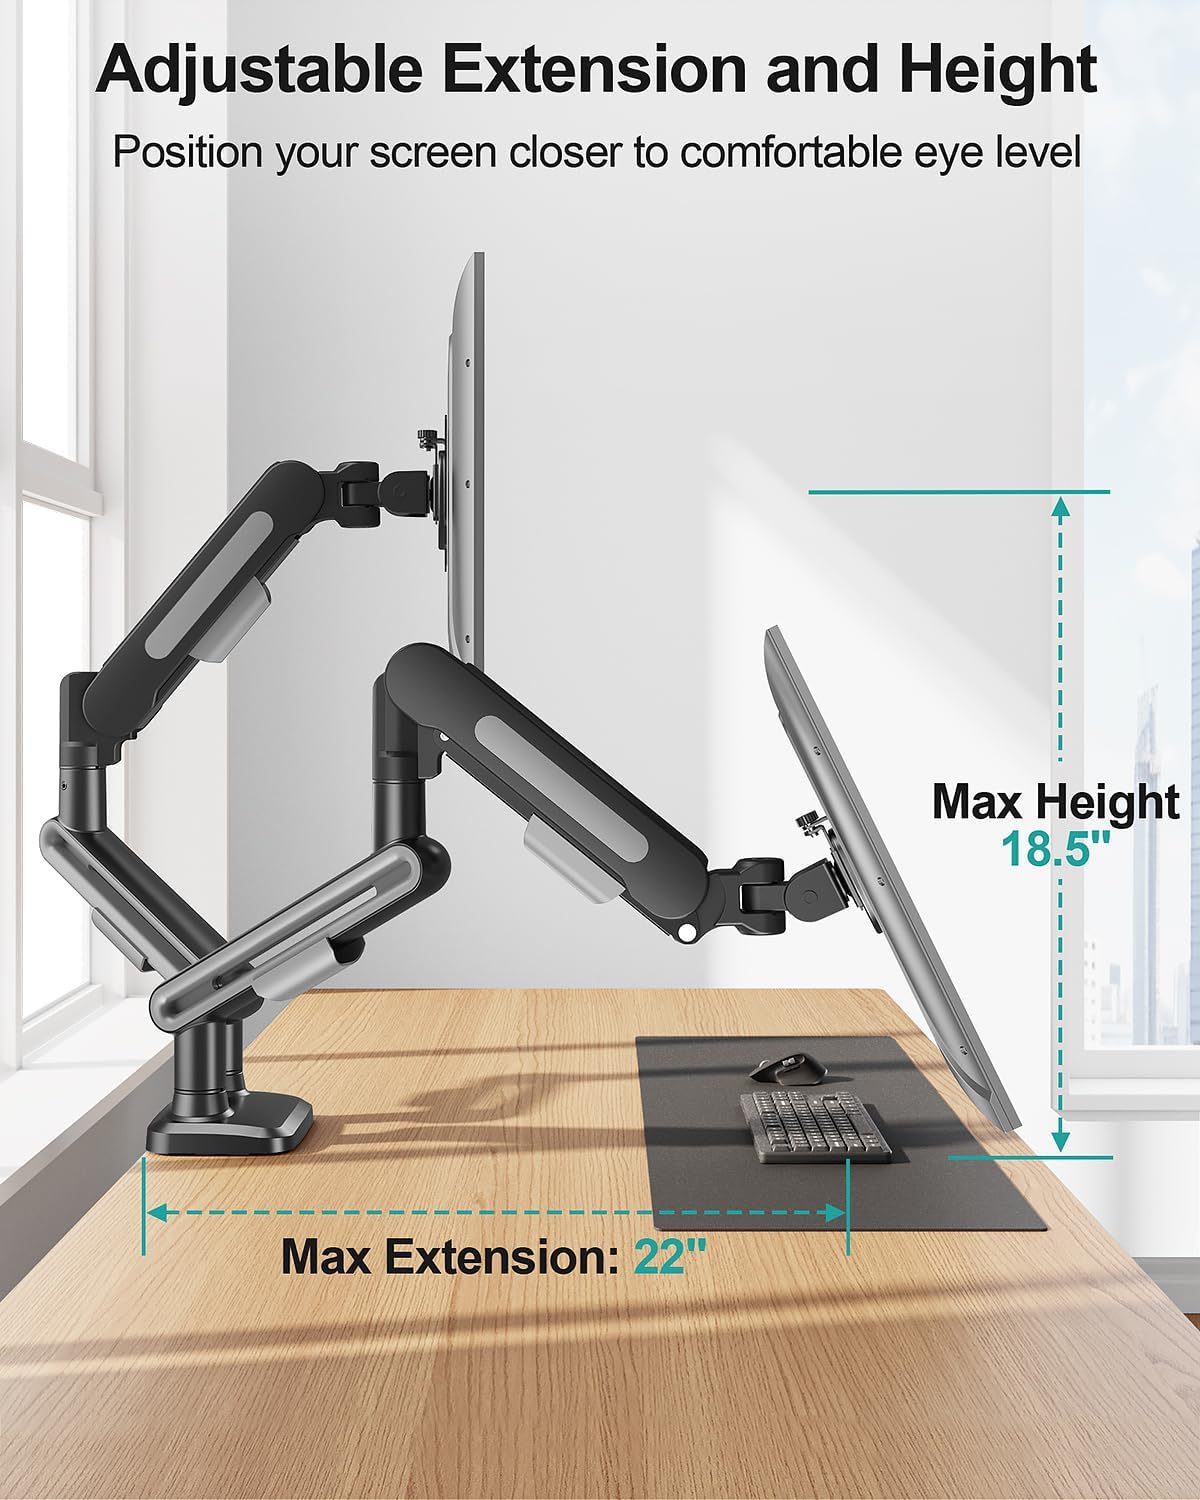
Image 6.1: Illustration of maximum extension and height adjustments.

Тасвири 6.2: Муфассал view of swivel, tilt, and rotation capabilities.

Тасвири 6.3: Мисamples of supported monitor configurations.
6.2 Танзими шиддати пружинаи газӣ
Adjust the gas spring tension to match the weight of your monitors for smooth and stable movement. Keep the arm in a horizontal position during adjustment.
- Monitor Raise Up (Lighter Monitor): Turn the adjustment screw clockwise ("-") to reduce tension.
- Monitor Drop Down (Heavier Monitor): Turn the adjustment screw counter-clockwise ("+") to increase tension.
Note: When adjusting gas spring tension, the number of turns depends on the display's weight. It may take up to 17 turns.
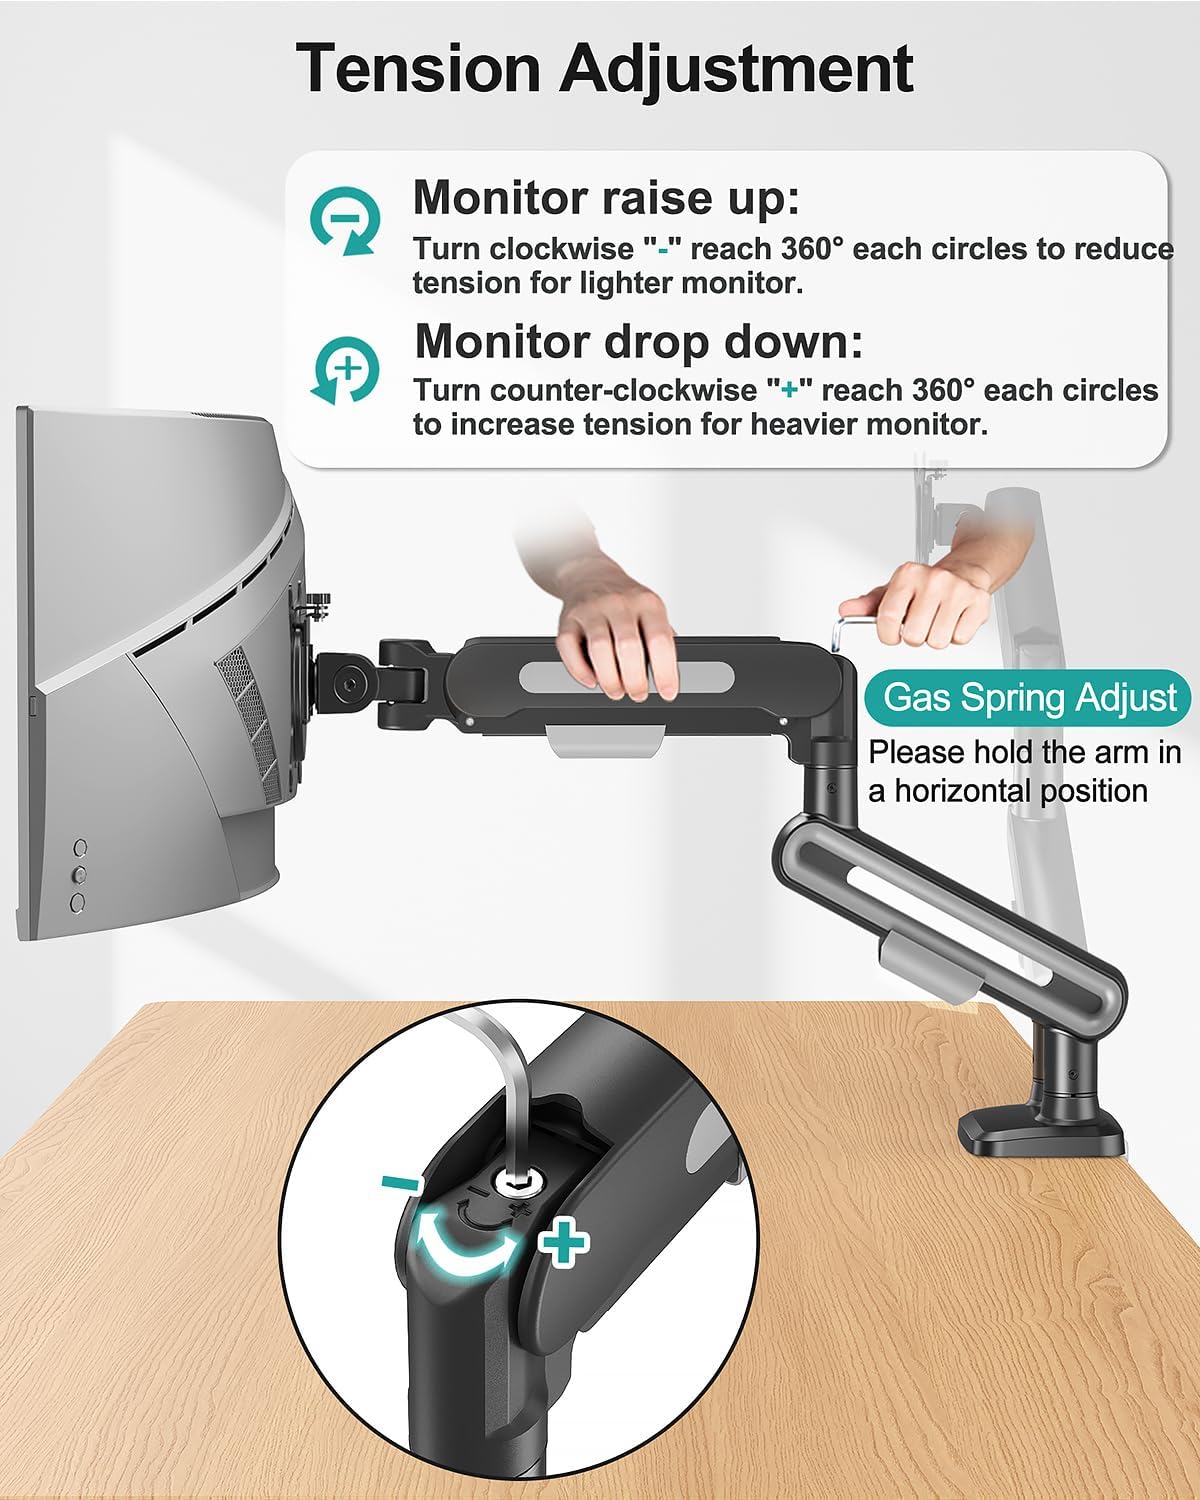
Image 6.4: Instructions for gas spring tension adjustment.

Image 6.5: Steps for adjusting monitor tilt.
7. Нигоҳдорӣ
- Ҳамаи винтҳо ва пайвастҳоро мунтазам тафтиш кунед, то боварӣ ҳосил кунед, ки онҳо маҳкам ва бехатаранд.
- Монтажро бо матои нарм тоза кунед, damp матоъ. Аз тозакунандаи абразивӣ худдорӣ кунед.
- Periodically re-adjust gas spring tension if monitor movement becomes too stiff or too loose.
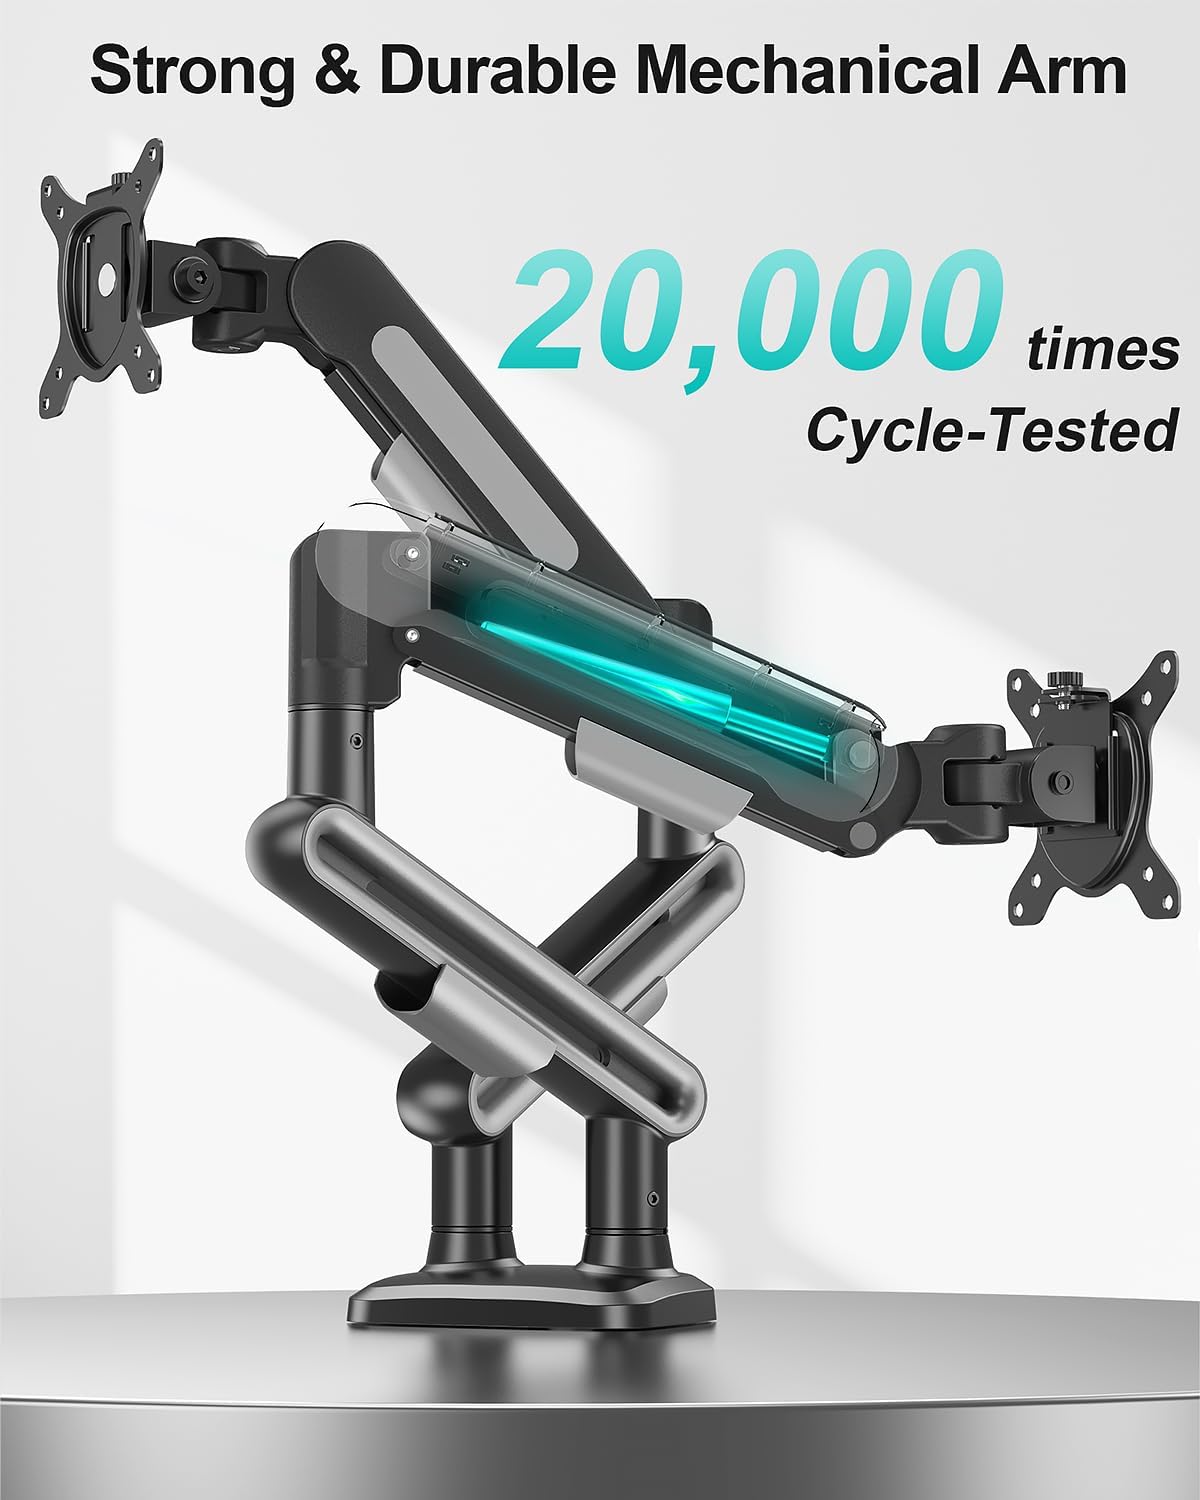
Image 7.1: The durable mechanical arm is designed for long-term use.
8. Баррасии мушкилот
- Monitor Sags/Drops: Increase gas spring tension by turning the adjustment screw counter-clockwise ("+").
- Monitor Too Stiff to Move: Decrease gas spring tension by turning the adjustment screw clockwise ("-").
- Кӯҳ ноустувор ҳис мекунад: Ensure all mounting hardware (C-clamp or grommet base) is securely tightened to the desk. Verify VESA plate screws are tight on the monitor.
9. Кафолат ва дастгирӣ
For warranty information or technical assistance, please refer to the contact details provided with your product packaging or visit the MOUNT PRO official website. Feel free to contact us if you encounter any problems during the installation and use of the product.