1. Муқаддима
Ташаккур ба шумо барои интихоб KOLINK Refractor Midi-Tower computer case. This manual provides essential information for the proper installation, operation, and maintenance of your new PC chassis. Please read this manual carefully before beginning the assembly process to ensure a smooth and safe build.
1.1 Маълумот дар бораи бехатарӣ
- Пеш аз насб кардан ё хориҷ кардани ҳама ҷузъҳо ҳамеша қувваи барқро аз васлаки деворӣ ҷудо кунед.
- Барои пешгирии зарари разряди электростатикӣ (ESD) ба ҷузъҳои ҳассос тасмаи дастони антистатикӣ пӯшед.
- Handle components with care. Avoid touching pins or circuit boards directly.
- Қисмҳо ва асбобҳои хурдро аз кӯдакон дур нигоҳ доред.
- Барои пешгирӣ аз гармии аз ҳад зиёд, вентилятсияи дурусти атрофи корпусро таъмин кунед.
2. Мундариҷаи баста
Please verify that all the following items are present in your package:
- KOLINK Refractor Midi-Tower Chassis
- Қуттии лавозимот (дорои винтҳо, қулфҳои мустаҳкам, бандҳои кабелӣ ва ғайра)
- Дастури корбар (ин ҳуҷҷат)
If any items are missing or damaged, please contact your retailer or KOLINK support.
3. Маҳсулот ба охир расидview
Familiarize yourself with the key features and components of your KOLINK Refractor Midi-Tower.
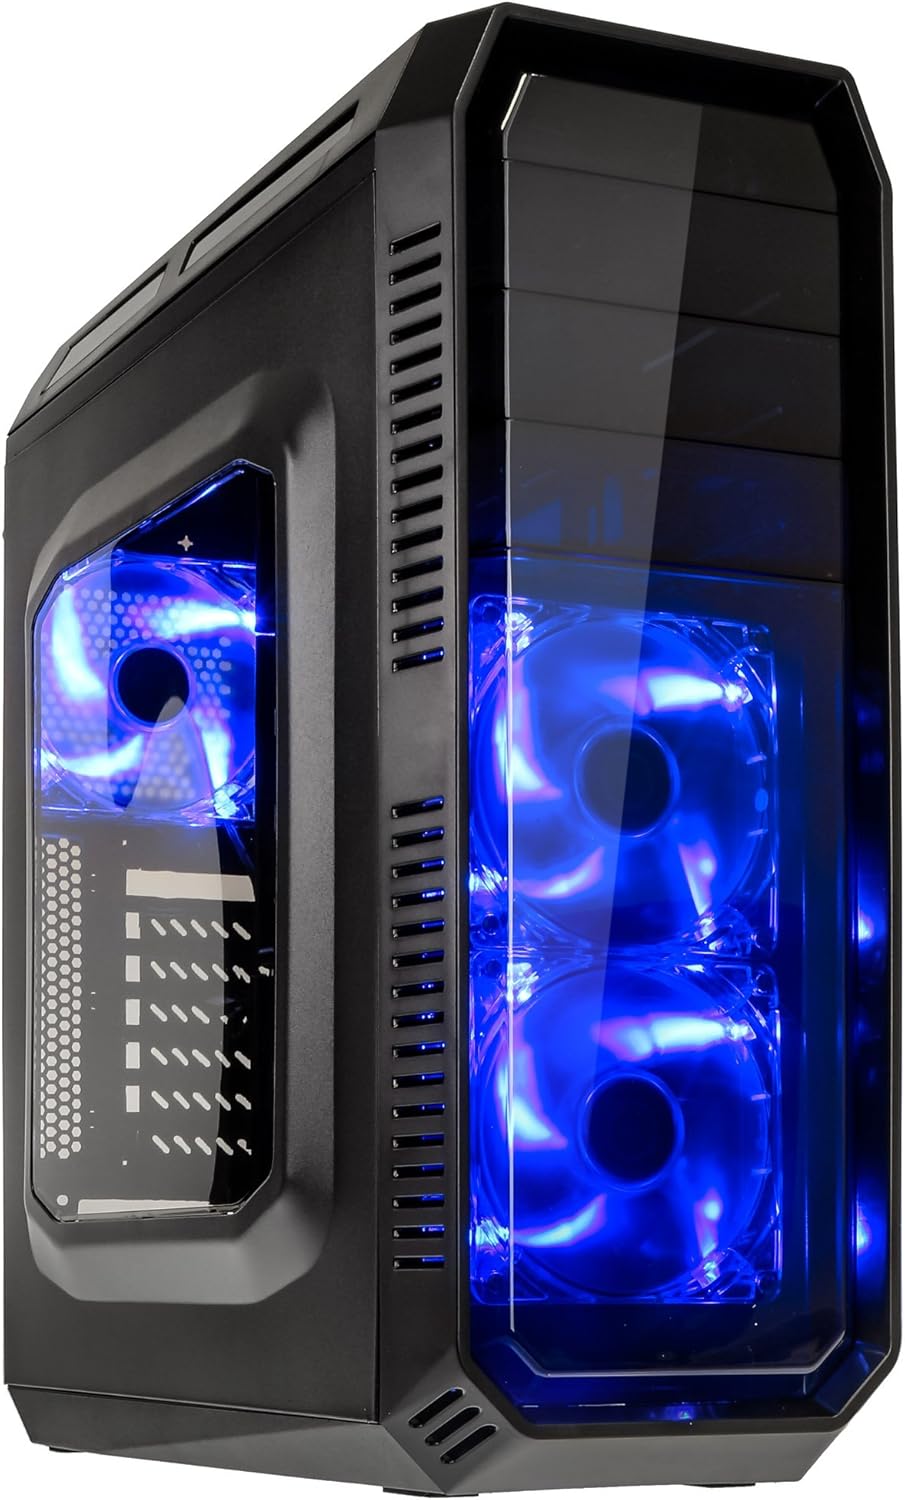
This image displays the KOLINK Refractor Midi-Tower from a front-left perspective, highlighting its sleek black design. The front panel features two pre-installed 120mm blue LED fans, visible through a transparent section, providing both cooling and aesthetic appeal. The left side panel includes a window, allowing visibility of internal components.

A top-front view of the case, illustrating the conveniently located I/O panel on the top. This panel includes two USB 3.0 ports, two USB 2.0 ports, and audio input/output jacks. The top surface also features a mesh area for additional ventilation, contributing to optimal airflow.

This image shows the right side panel of the KOLINK Refractor Midi-Tower. It is a solid black panel, designed for cable management behind the motherboard tray, ensuring a clean and organized interior.

This composite image provides three distinct views of the case. The left panel shows the front with its blue LED fans. The middle panel displays the rear of the case, featuring the motherboard I/O cutout, seven expansion slots, and a 120mm fan mount. The right panel offers a close-up of the top I/O ports, including USB 3.0, USB 2.0, and audio jacks.

A detailed close-up of the top I/O panel. It clearly shows the power and reset buttons, two USB 3.0 ports, two USB 2.0 ports, and the microphone and headphone jacks, providing easy access for peripherals.
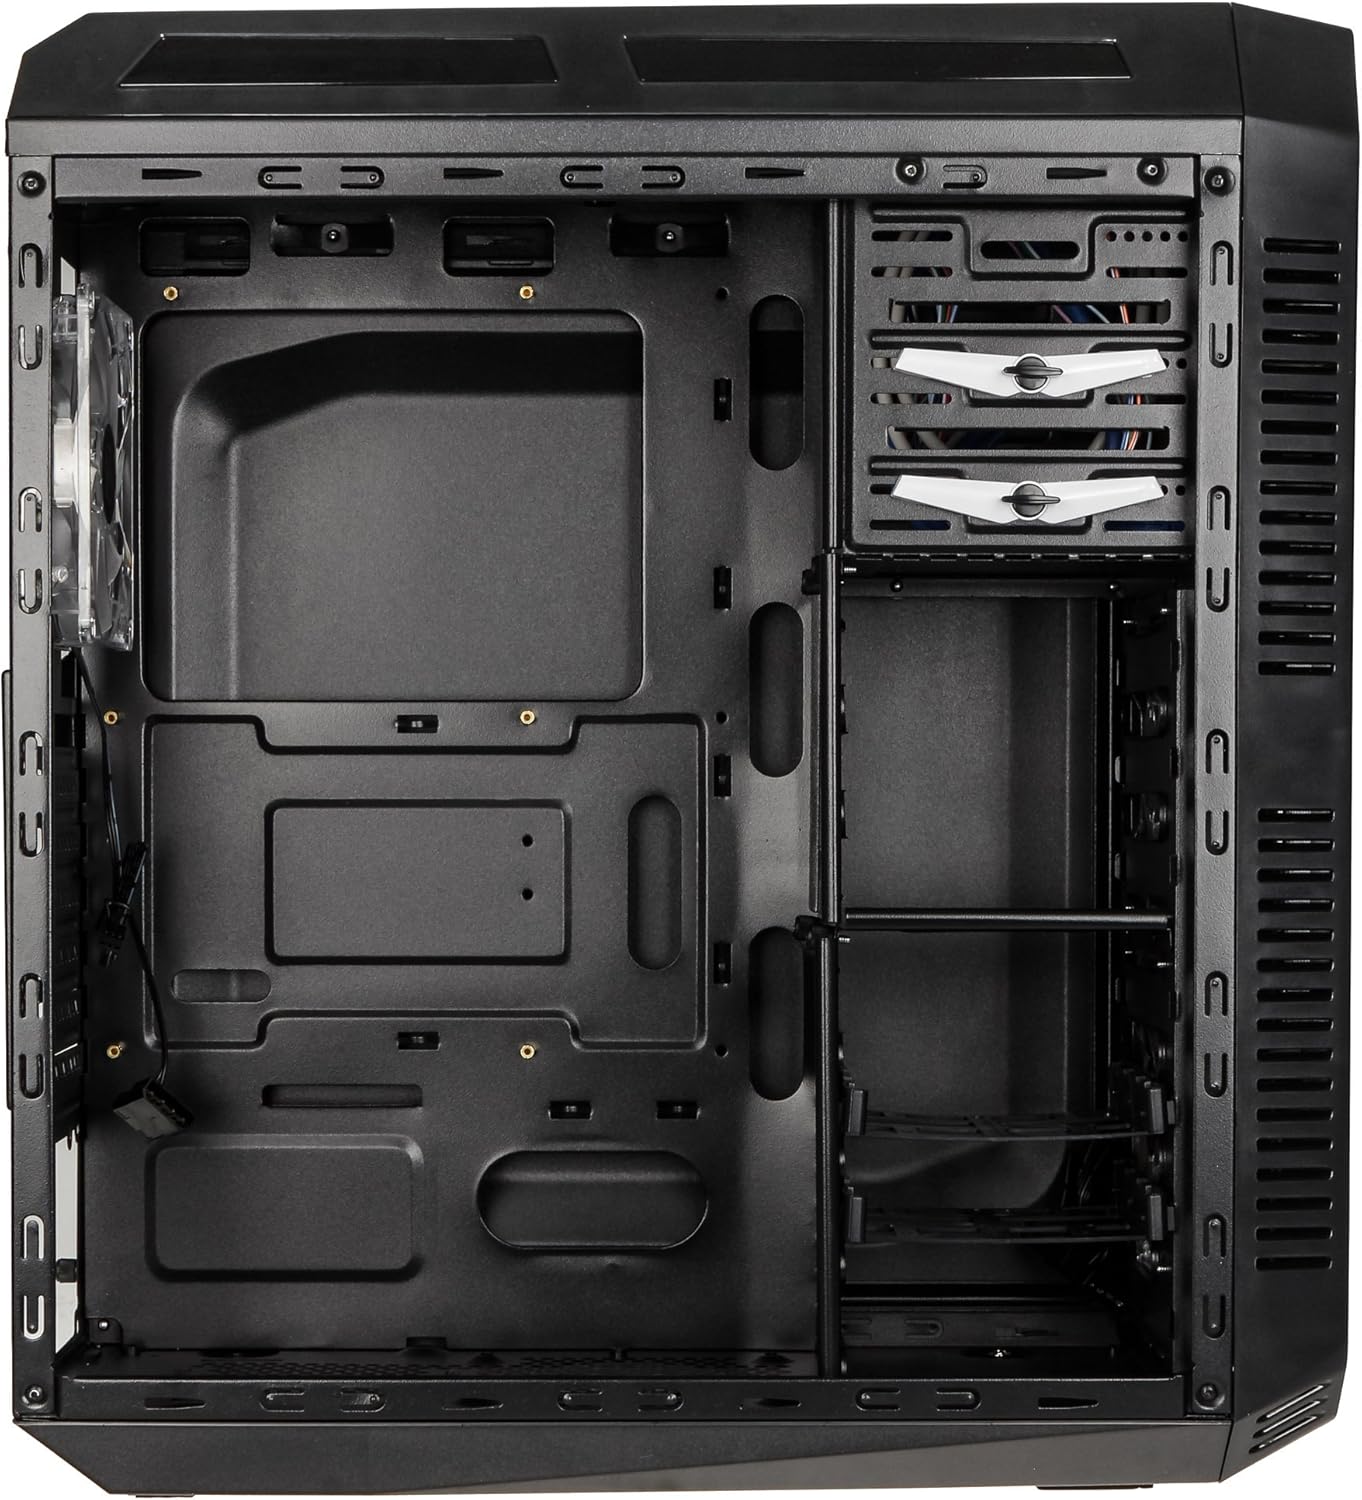
This image presents the interior of the case from the left side, revealing the spacious motherboard tray compatible with ATX motherboards. It features a large cutout behind the CPU area for easy cooler installation and multiple grommeted holes for efficient cable routing.

Як дохилӣ view from the right side, focusing on the drive bay configuration. The case offers three external 5.25-inch bays and seven internal 2.5/3.5-inch drive bays, providing ample storage expansion options.

A closer look at the internal drive bays, illustrating the design for mounting 2.5-inch or 3.5-inch storage drives. These bays are designed for easy installation and removal of hard drives and SSDs.

Ин тасвир як дохилиро таъмин мекунад view looking down from the top, showcasing the pre-installed 120mm blue LED fan at the rear for exhaust. The top panel's mesh area for additional fan mounting is also visible, contributing to overall system cooling.
4. Танзим ва насб
Follow these steps to install your computer components into the KOLINK Refractor Midi-Tower.
4.1 Омода кардани парванда
- Қуттиро дар сатҳи ҳамвор ва устувор ҷойгир кунед.
- Remove the left and right side panels by unscrewing the thumbscrews at the rear of the case and sliding the panels backward.
4.2 Насби motherboard
- Install the I/O shield that came with your motherboard into the cutout at the rear of the case.
- Ensure the correct motherboard standoffs are installed for your ATX motherboard. Adjust or add standoffs as necessary using the provided accessory kit.
- Модари худро бодиққат ба стендҳо ҷойгир кунед ва сӯрохиҳои винтро мувофиқ кунед.
- Secure the motherboard with the appropriate screws from the accessory kit.
4.3 Насби таъминоти барқ
- Position your ATX power supply unit (PSU) in the designated compartment at the bottom rear of the case.
- Align the PSU with the screw holes at the rear of the case.
- Secure the PSU using the screws provided with your power supply.
4.4 Насби диск
5.25-inch External Drives:
- Remove the desired 5.25-inch bay cover from the front panel.
- Slide your optical drive or other 5.25-inch device into the bay from the front.
- Secure the drive using the tool-less clips or screws.
2.5/3.5-inch Internal Drives:
- Locate the internal drive bays.
- Mount your 2.5-inch SSD or 3.5-inch HDD into the drive trays.
- Slide the populated drive trays back into the drive cage until they click into place.
4.5 Насби корти васеъкунӣ
- Сарпӯшҳои зарурии сӯрохи васеъкуниро дар қафои корпус хориҷ кунед.
- Insert your graphics card or other PCIe expansion card into the corresponding slot on the motherboard.
- Кортро бо винтҳои додашуда маҳкам кунед.
4.6 Идоракунии кабел
Utilize the cable routing holes and tie-down points behind the motherboard tray to organize cables. This improves airflow and gives your build a cleaner appearance.
4.7 Fan Installation (Optional)
The case comes with two 120mm blue LED fans pre-installed at the front and one 120mm blue LED fan at the rear. Additional fan mounting locations include:
- Top: 1x 120/140mm fan
- Bottom: 1x 120mm fan (under the PSU)
Install additional fans as needed for optimal cooling, ensuring proper airflow direction.
5. Дастурҳои истифодабарӣ
5.1 Фаъолсозии ибтидоӣ
- Once all components are installed and cables are connected, replace both side panels.
- Монитор, клавиатура, муш ва дигар дастгоҳҳои периферии худро пайваст кунед.
- Connect the power cable to the PSU and then to a wall outlet.
- Press the power button on the top I/O panel to start your system.
5.2 Front Panel I/O Usage
Панели болоии I/O дастрасии қулайро ба:
- Портҳои USB 3.0 (x2): Барои интиқоли баландсуръати маълумот бо дастгоҳҳои мувофиқ.
- Портҳои USB 2.0 (x2): Барои пайваст кардани дастгоҳҳои стандартии USB.
- Ҷойҳои аудио (Гӯшмонак/Микрофон): Барои пайваст кардани гӯшмонакҳо ё дастгоҳҳои аудиоии беруна.
- Тугмаи барқ: To turn the system on/off.
- Тугмаи Reset: Барои аз нав оғоз кардани система.
5.3 Равшании LED
The pre-installed front and rear fans feature blue LED lighting, which illuminates when the system is powered on, adding an aesthetic element to your build.
6. Нигоҳдорӣ
Regular maintenance helps ensure optimal performance and longevity of your computer system.
6.1 Тозакунӣ
- Филтрҳои чанг: The case includes a removable dust filter under the PSU. Regularly remove and clean this filter to prevent dust buildup and maintain airflow.
- берунӣ: Сатҳи беруниро бо нарм пок кунед, гamp матоъ. Аз тозакунандаи абразивӣ худдорӣ кунед.
- дохилӣ: Periodically use compressed air to remove dust from internal components and fan blades. Ensure the system is powered off and unplugged before cleaning the interior.
6.2 Airflow Optimization
Ensure that the case's ventilation areas (front, top, rear, bottom) are not obstructed. Proper cable management also contributes significantly to unrestricted airflow within the case.
7. Баррасии мушкилот
Ин бахш мушкилоти умумиеро, ки шумо метавонед дучор ояд, баррасӣ мекунад.
7.1 Масъалаҳои умумӣ
- Система фаъол нест:
- Санҷед, ки оё сими барқӣ ба ҳам ба PSU ва ҳам ба розеткаи деворӣ боэътимод пайваст аст.
- Боварӣ ҳосил кунед, ки калиди PSU дар ҳолати 'ON' аст.
- Verify that the front panel power button cable is correctly connected to the motherboard.
- Confirm all internal power cables (24-pin ATX, CPU, GPU) are properly seated.
- Мухлисон чарх намезананд:
- Check if the fan power cables are correctly connected to the motherboard or fan controller.
- Ensure the system is receiving power.
- Портҳои USB кор намекунанд:
- Verify that the front panel USB 3.0 and USB 2.0 headers are correctly connected to the motherboard.
- Ensure the device you are connecting is functioning correctly.
- Audio Ports Not Working:
- Check that the front panel audio header (HD Audio) is correctly connected to the motherboard.
- Confirm your audio drivers are installed and up to date.
For further assistance, please refer to your motherboard manual or contact KOLINK support.
8. Мушаххасоти
Мушаххасоти муфассали техникӣ барои KOLINK Refractor Midi-Tower.
| Хусусият | Мушаххасоти |
|---|---|
| Номи модел | Refractor Midi-Tower |
| Андозаҳо (W x H x D) | 190 x 475 x 445 мм (7.5 x 18.7 x 17.5 инч) |
| Материал | Steel (body), Plastic (front) |
| Вазн | тахминан. 4.8 кг (10.6 фунт) |
| Ранги | Сиёҳ |
| Формаи форма | Бурҷи Миди |
| Мутобиқати motherboard | ATX |
| Ҷойҳои диски беруна | 3х 5.25 дюйм |
| Ҷойҳои диски дохилӣ | 7x 2.5/3.5-inch |
| Ҷойҳои васеъ | 7 |
| Мухлисони пешакӣ насбшуда | 2x 120mm (front, blue LED), 1x 120mm (rear, blue LED) |
| Fan Support (Total Possible) | Front: 2x 120mm, Top: 1x 120/140mm, Bottom: 1x 120mm, Rear: 1x 120mm |
| Панели вуруд / баромад | 2x USB 3.0, 2x USB 2.0, 1x Audio In/Out |
| Дарозии ҳадди аксар корти графикӣ | 360 мм |
| Баландии ҳадди аксар сардтар CPU | 174 мм |
| Мутобиқати PSU | Standard ATX (optional) |
| Филтрҳои чанг | Floor (under PSU, removable) |
9. Кафолат ва дастгирӣ
KOLINK products are manufactured to high-quality standards. This product is covered by a manufacturer's warranty against defects in materials and workmanship. The specific terms and duration of the warranty may vary by region and retailer.
Please retain your proof of purchase for warranty claims. For technical support, warranty inquiries, or to report missing/damaged parts, please contact your point of purchase or visit the official KOLINK webсайт барои захираҳои дастгирӣ.
KOLINK Official Webсайт: www.kolink.eu (Please note: This is a general link and may not lead directly to a support page for this specific model.)


