1. Муқаддима
This manual provides detailed instructions for the proper use, calibration, and maintenance of your Geko G02662 Freezing Point Refractometer. This precision optical instrument is designed to measure the freezing point of automotive coolants (ethylene glycol and propylene glycol based) and battery fluid condition. Please read this manual thoroughly before operating the device to ensure accurate results and prolong its lifespan.
2. Маълумот оид ба бехатарӣ
- Always handle the refractometer with care. Avoid dropping or subjecting it to strong impacts.
- Do not immerse the instrument in water or other liquids.
- Avoid direct exposure of the prism to strong light sources, as this may damage the optical components.
- When handling automotive fluids, wear appropriate personal protective equipment (e.g., gloves, eye protection) and follow manufacturer safety guidelines for the fluids being tested.
- Keep the instrument out of reach of children.
3. Мундариҷаи баста
Боварӣ ҳосил кунед, ки ҳама ашё дар баста мавҷуд аст:
- Geko G02662 Refractometer
- Пипетка
- Mini-screwdriver (for calibration)
- Либоси тозакунӣ
- Қуттии нигаҳдорӣ
- Дастури таълимӣ (ин ҳуҷҷат)
4. Маҳсулот ба охир расидview
Familiarize yourself with the components of the Geko G02662 Refractometer:
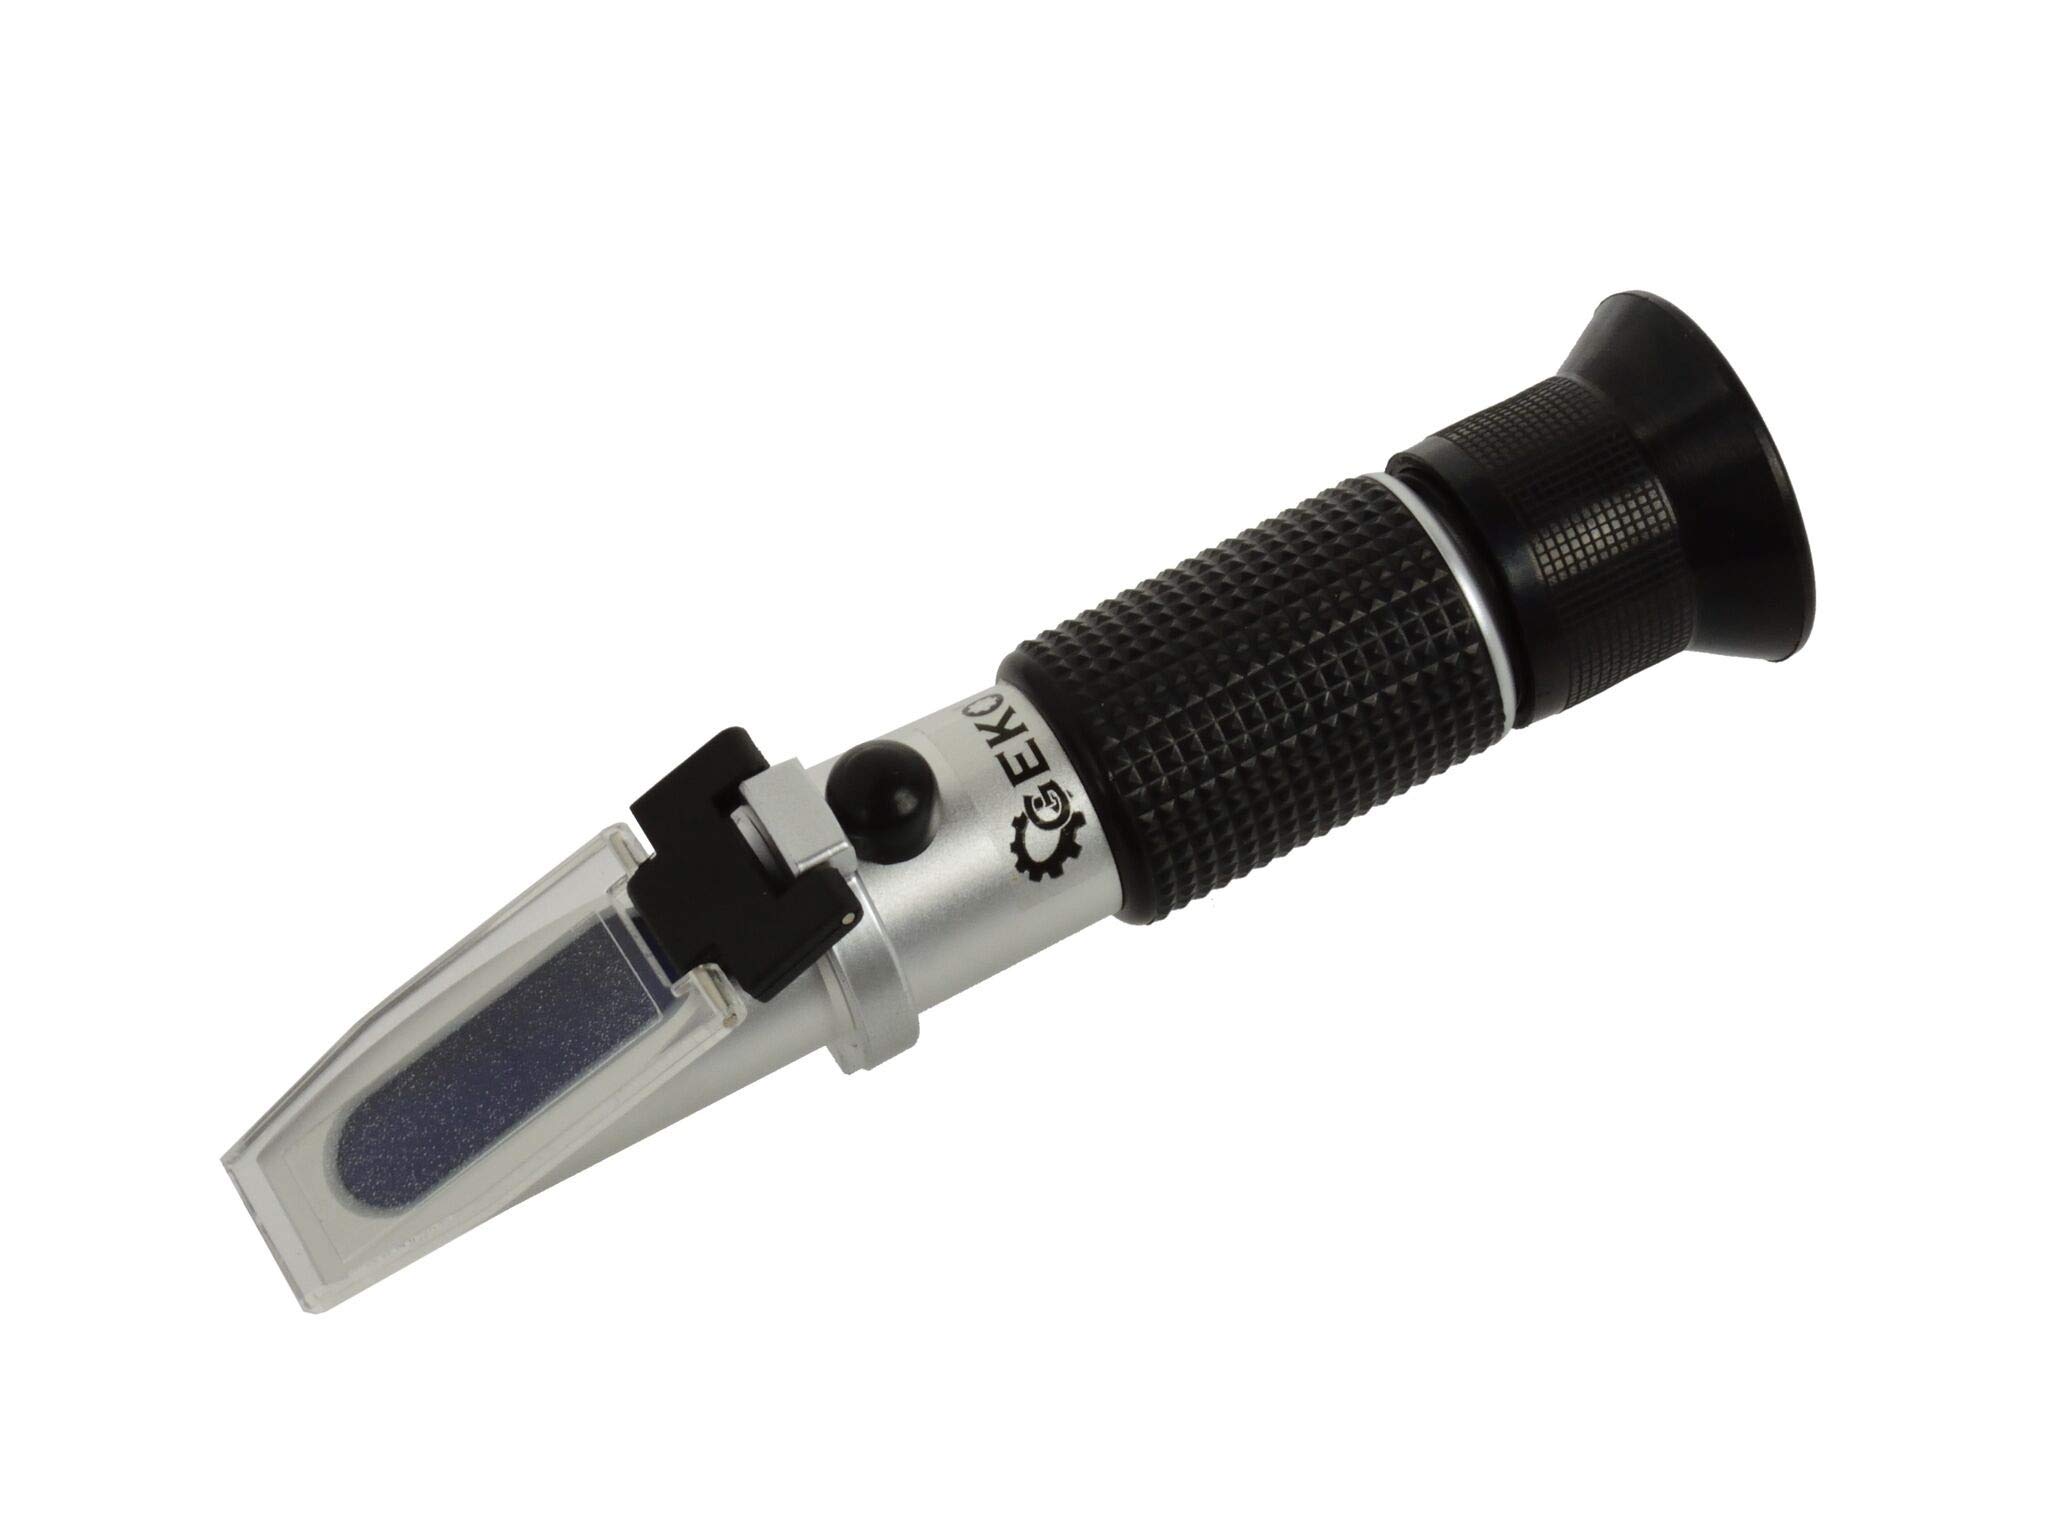
Расми 1: Тараф view of the Geko G02662 Refractometer. This image displays the overall structure of the device, including the eyepiece, main body, and prism assembly.

Расми 2: Close-up of the prism and cover plate. The sample is applied to the main prism, which is then covered by the transparent plate.

Расми 3: View of the eyepiece. The user looks through this end to read the measurement scale.
- чашмак: Одат view the measurement scale. Rotate to adjust focus.
- Дасти резинӣ: Provides a secure hold.
- Ҳайати асосӣ: Contains the optical system.
- Calibration Screw: Used to adjust the zero point (under a cap).
- Призма: The surface where the sample is placed.
- Лавҳаи сарпӯш: Covers the sampдар призма.
5. Танзимот
Before first use, or if the focus appears blurry:
- Hold the refractometer towards a light source.
- Ба воситаи чашмак нигоҳ кунед.
- Rotate the eyepiece (part 1 in Figure 1) until the scale is clear and in sharp focus.
6. Дастурҳои истифодабарӣ
Follow these steps to take an accurate measurement:
- Clean the Prism: Ensure the prism (part 5) and cover plate (part 6) are clean and dry using the provided cleaning cloth.
- Ба Сampле: Open the cover plate. Using the pipette, place 2-3 drops of the liquid to be tested onto the main prism.
- Close Cover Plate: Gently close the cover plate so that the liquid spreads evenly across the entire surface of the prism without air bubbles.
- Wait for Temperature Equalization: Allow approximately 30 seconds for the sample to equalize to the instrument's temperature. This is crucial for accurate readings.
- Андозаро хонед: Hold the refractometer towards a light source and look through the eyepiece. The boundary line between the blue and white fields will indicate the measurement on the appropriate scale.
- Пас аз истифода тоза кунед: Immediately after each measurement, clean the prism and cover plate thoroughly with a damp cloth, then dry with the cleaning cloth. Failure to do so can lead to inaccurate readings and damage to the prism.
7. Калибрченкунӣ
Calibration should be performed before first use, after cleaning, or if you suspect inaccurate readings. Use distilled water for calibration.
- Ensure the refractometer is at room temperature (20°C / 68°F).
- Clean the prism and cover plate thoroughly.
- Place 2-3 drops of оби тозашуда onto the prism. Close the cover plate.
- Wait 30 seconds for temperature equalization.
- Look through the eyepiece. The boundary line should align with the 'WATERLINE' or '0' mark on the scale.
- If it does not, use the provided mini-screwdriver to turn the calibration screw (part 4, usually under a small cap) until the boundary line aligns perfectly with the 'WATERLINE' or '0' mark.
- Clean and dry the prism and cover plate.
8. Нигоҳдорӣ ва нигоҳубин
- Тозакунӣ: Always clean the prism and cover plate immediately after use with a soft, damp cloth, then dry with the cleaning cloth. Do not use abrasive materials or solvents.
- Нигоҳдорӣ: Store the refractometer in its protective case in a dry, cool, and dust-free environment when not in use. Avoid direct sunlight or extreme temperatures.
- Пешгирӣ кардани зарар: Do not touch the prism surface with your fingers or any hard objects.
9. Баррасии мушкилот
| Мушкилот | Сабаби эҳтимолӣ | Ҳалли |
|---|---|---|
| Blurry scale | Eyepiece out of focus | Rotate the eyepiece to adjust focus. |
| Хониши нодуруст | Instrument not calibrated; Prism dirty; Insufficient sample; Air bubbles in sample; Temperature difference. | Calibrate the instrument; Clean the prism; Apply sufficient sample (2-3 drops); Ensure no air bubbles; Allow sample to equalize temperature. |
| Boundary line not visible | Insufficient light; Sample too dark/opaque. | Point towards a brighter light source; Ensure sample is clear enough for measurement. |
10. Мушаххасоти
- Рақами модел: Geko G02662
- Истеҳсолкунанда: Firma Handlowa GEKO
- Андозаҳои баста: 35 х 35 х 15 см
- Вазн: 220 гр
- Диапазони андозагирӣ: Typically for Ethylene Glycol, Propylene Glycol, and Battery Fluid (specific scales visible through eyepiece).
- Ҷуброни автоматии ҳарорат (ATC): Yes (for accurate readings regardless of ambient temperature).
11. Кафолат ва дастгирӣ
Барои гирифтани маълумот дар бораи кафолат ва дастгирии техникӣ, лутфан ба ҳуҷҷатҳои пешниҳодшуда ҳангоми харид муроҷиат кунед ё бо фурӯшандаи худ тамос гиред. Квитансияи хариди худро ҳамчун далели харид нигоҳ доред.


