1. Муқаддима
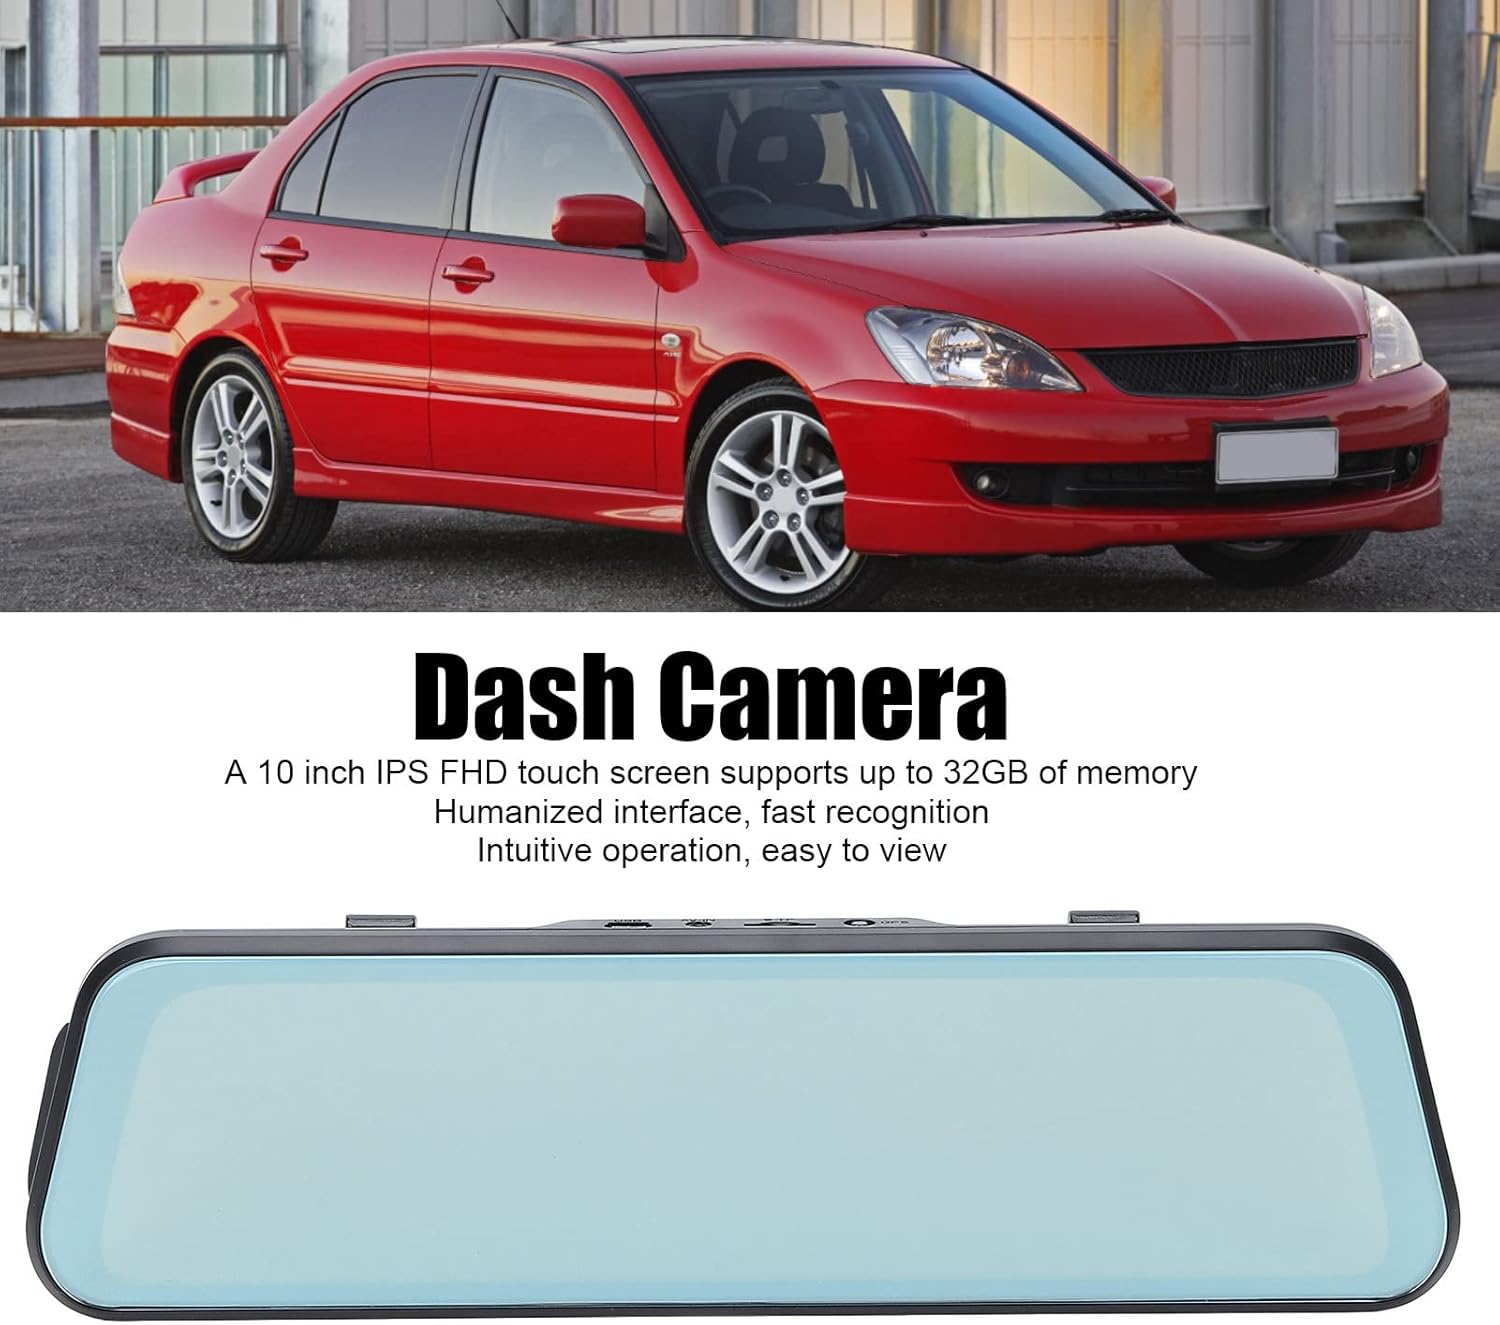
This manual provides detailed instructions for the installation, operation, and maintenance of your Bewinner 1080p Car Dash Cam. Please read this manual thoroughly before using the device to ensure proper functionality and safety. This dash cam features a 10-inch IPS touchscreen and dual front and rear cameras for comprehensive vehicle recording.
2. Маълумот оид ба бехатарӣ
- Боварӣ ҳосил кунед, ки камераи идоракунии мошин дуруст васл шудааст ва ба ронанда халал намерасонад view ё ба идоракунии мошин халал расонанд.
- Ҳангоми рондан дастгоҳро истифода набаред. Танзимотро танҳо вақте танзим кунед, ки воситаи нақлиёт бехатар таваққуф карда шавад.
- Use only the provided power adapter to prevent damage to the device and vehicle.
- Дастгоҳро ба ҳарорати аз ҳад зиёд, нури бевоситаи офтоб барои муддати тӯлонӣ ё намии аз ҳад зиёд нагузоред.
- Keep the lens clean for optimal recording quality.
- Regularly back up important video fileс барои пешгирии талафот.
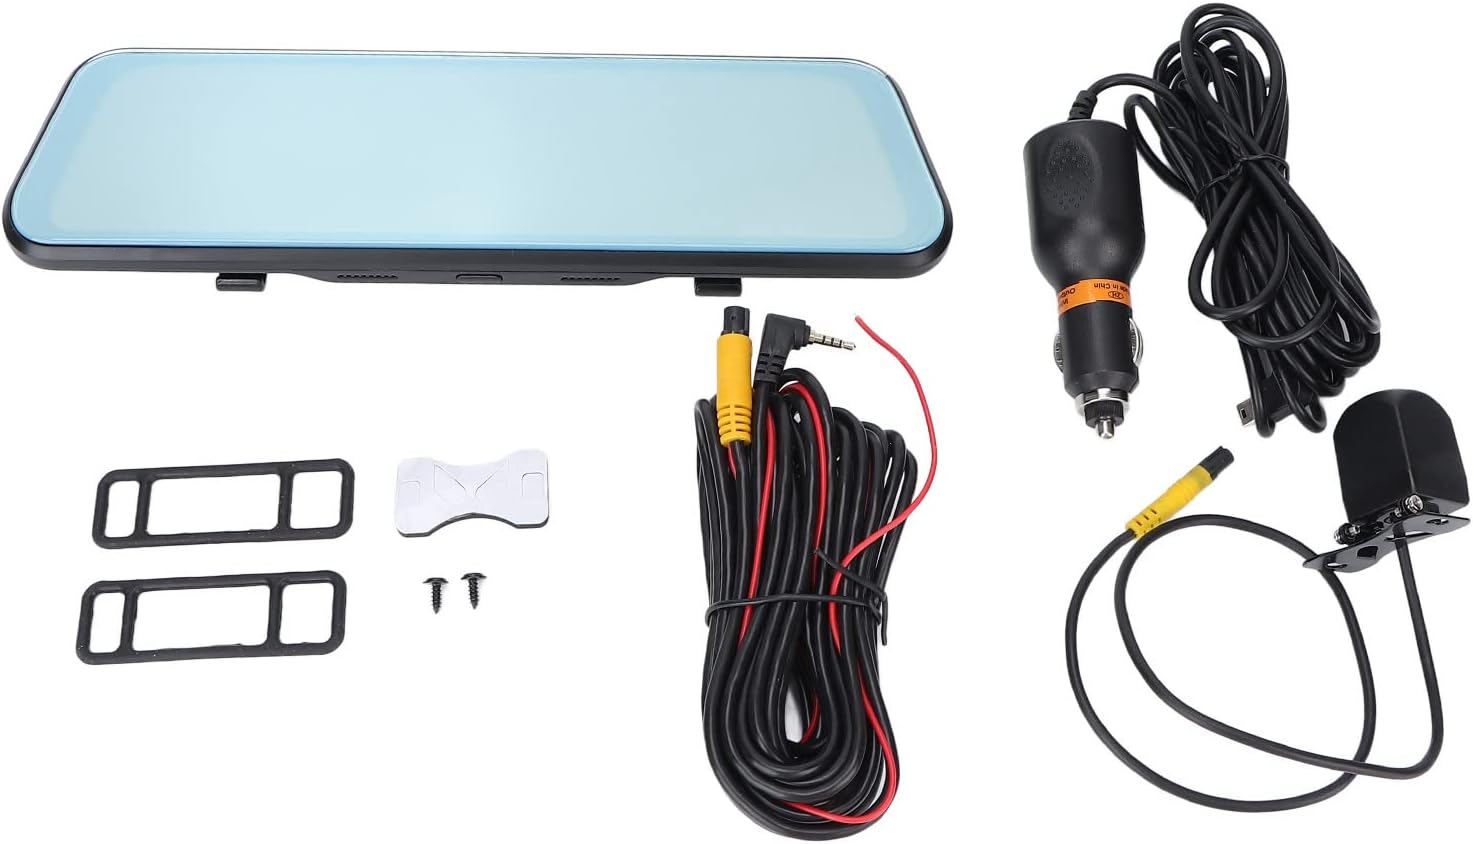
3. Мундариҷаи баста
Боварӣ ҳосил кунед, ки ҳамаи ҷузъҳои дар поён овардашуда ба бастаи шумо дохил карда шудаанд:
- Bewinner 1080p Car Dash Cam (Main Unit)
- Камераи пушти
- 2 x Power Cords (Car Charger)
- Дастури корбар
- Double-sided Adhesive Tape
- 2 x винтҳо
- 2 x Mounting Accessories (Rubber Straps)
4. Маҳсулот ба охир расидview
The Bewinner Dash Cam is designed to provide reliable video recording for your vehicle. It features a large touchscreen display and dual cameras for comprehensive coverage.
4.1 Main Dash Cam Unit

The main unit integrates a 10-inch IPS touchscreen display and the front camera. It is designed to be mounted over your existing rearview оина.

4.2 Камераи пушти

The rear camera provides a wide-angle view of the area behind your vehicle, enhancing safety and recording capabilities.
5. Танзим ва насб
5.1 Гузоштани корти Micro SD
Before installation, insert a Class 10 or higher Micro SD card (up to 32GB, not included) into the dash cam's card slot. Ensure the card is inserted correctly until it clicks into place.
5.2 Mounting the Main Dash Cam Unit
- Attach the two rubber straps (mounting accessories) to the back of the main dash cam unit.
- Securely fasten the dash cam over your vehicle's existing rearview mirror using the rubber straps. Ensure it is stable and does not vibrate.
- Adjust the front camera lens angle to capture the desired view рохи пеш.

5.3 Насб кардани камераи қафо
- Choose a suitable location at the rear of your vehicle, typically above the license plate, for the rear camera.
- Use the provided double-sided adhesive tape and screws to securely mount the rear camera.
- Route the rear camera cable to the main dash cam unit. Connect the cable to the designated rear camera input port on the main unit.
- If applicable, connect the red wire of the rear camera cable to your vehicle's reverse light power source for automatic reverse display functionality.
5.4 Пайвастшавии барқ
- Connect one end of the car charger (power cord) to the dash cam's power input port.
- Нӯги дигари пуркунандаи мошинро ба розеткаи оташфишони мошинатон пайваст кунед.
- The dash cam will automatically power on and begin recording when the vehicle engine starts, and power off when the engine is turned off.

6. Дастурҳои истифодабарӣ
6.1 Фаъол кардан/хомӯш кардан
- Автоматӣ: The device powers on and off automatically with the vehicle's ignition.
- Дастӣ: Press and hold the power button (if available) to manually turn the device on or off.
6.2 Амали экрани сенсорӣ
The 10-inch IPS touchscreen allows for intuitive navigation and control. Tap icons to select functions, swipe to navigate menus or switch camera views.
6.3 Усулҳои сабт
- Сабти давр: Videos are recorded in segments (e.g., 1, 3, or 5 minutes). When the memory card is full, the oldest unlocked fileс аз нав навишта шудаанд.
- Сабти ҳолатҳои фавқулодда (G-Sensor): The built-in G-sensor detects sudden impacts or collisions and automatically locks the current video file ки аз болои навишта шудани он пешгирй карда шавад.
- Мониторинги таваққуфгоҳ: When enabled, the dash cam will automatically start recording if it detects a collision or vibration while the vehicle is parked. This feature typically requires a hardwire kit (not included) for continuous power.
6.4 Иваз кардани камера Views
On the touchscreen, you can typically swipe left or right, or tap a specific icon, to switch between front camera view, камераи пушти view, or a picture-in-picture display showing both simultaneously.

6.5 Танзимоти меню
Access the settings menu via the touchscreen to configure various options:
- Ҳалли видео: Set recording resolution (e.g., 1080p for both front and rear).
- Давомнокии сабти давр: Adjust segment length (e.g., 1/3/5 minutes).
- Ҳассосияти G-sensor: Adjust the sensitivity of impact detection.
- Мониторинги таваққуфгоҳ: Ин хусусиятро фаъол ё ғайрифаъол кунед.
- Сана/Вақт: Барои вақти дақиқ сана ва вақти дурустро таъин кунедampс дар бораи сабтҳо.
- Забон: Select your preferred language (supports Chinese, English, French, Italian, Korean, Russian, Spanish, German, Japanese, etc.).
- SD кортро формат кунед: Format the Micro SD card to ensure optimal performance and clear old data.
7. Нигоҳдорӣ
- Тозакунӣ: Use a soft, dry cloth to clean the dash cam screen and lens. Do not use abrasive cleaners or solvents.
- Нигоҳдории корти SD: Format the Micro SD card regularly (e.g., once a month) to prevent data corruption and ensure smooth recording. Back up any important files пеш аз формат кардан.
- Нигоҳдорӣ: If storing the device for an extended period, remove it from the vehicle and store it in a cool, dry place.
8. Баррасии мушкилот
| Мушкилот | Ҳалли имконпазир |
|---|---|
| Камераи тире фаъол нест. |
|
| Сабт қатъ мешавад ё ях мекунад. |
|
| Сифати видео. |
|
| Rear camera not displaying. |
|
9. Мушаххасоти
| Хусусият | Тафсилот |
|---|---|
| Рақами модел | Dpofirs37z42emfyt9349 |
| Экрани намоиш | Экрани сенсории 10-дюймаи IPS |
| Қарори камераи пеши | 1920 x 1080p @ 30 кадр / сония |
| Қарори камераи пушти сар | 1920 x 1080p @ 30fps (or 1920 x 720p @ 30fps) |
| Front Lens Angle | 170 ° кунҷи васеъ |
| Rear Lens Angle | 140 ° кунҷи васеъ |
| Дастгирии нигаҳдорӣ | Micro SD Card up to 32GB (Class 10 or higher recommended) |
| Иқтидори батарея | 450 mAh Lithium Battery (built-in) |
| Хусусиятҳои махсус | Night Vision, Touch Screen, Loop Recording, G-Sensor, Parking Monitor, Time-lapse Recording |
| Забонҳои дастгирӣ | Chinese, English, French, Italian, Korean, Russian, Spanish, German, Japanese, etc. |
10. Кафолат ва дастгирӣ
Bewinner products are designed for reliability and performance. For specific warranty details, please refer to the warranty card included with your purchase or contact Bewinner customer support. If you encounter any issues not covered in this manual, please reach out to our customer service team for assistance.
For further support, visit the official Bewinner webсайт ё фурӯшандаи худ тамос гиред.
