1. Муқаддима
The SINOTIMER TM612 is a sophisticated two-channel, 7-day, 24-hour programmable electronic digital time switch designed for precise control of electrical circuits. It features two independent relay outputs, allowing for versatile application in various automation tasks. This manual provides essential information for the proper installation, operation, and maintenance of your TM612 timer switch.

Расми 1: Пеш view of the SINOTIMER TM612 Digital Time Switch, showing the LCD display and control buttons.
2. Хусусиятҳо
- Монтажи роҳи оҳани DIN: 36mm DIN rail time switch for easy installation.
- Баромади ду каналӣ: Two independent volt-free relay outputs.
- Programmable Cycles: Supports 7-day and 24-hour programming.
- Extensive Program Memory: 44 ON/OFF programs for daily and weekly cycles, plus 44 memory pulse programs.
- Adjustable Pulse Duration: Pulse duration can be adjusted from 1 second to 59 seconds.
- Дақиқии баланд: Accurate-to-the-minute control with a low average error of 1s/24h (at 25°C).
- Multi-Language Display: Supports English, Portuguese, Italian, Spanish, German, and French.
- Намоиши LCD: High contrast LCD display showing year/month/day/hour/minute.
- Нишондиҳандаи барқ: LED power ON/OFF indicator.
- Нусхаи батарея: Replaceable 3V CR2032 battery for power failure backup, providing up to 60 days of blackout memory.
- Истеъмоли кам: Designed with low power consumption and a high-accuracy CMOS chip.
- Anti-Jamming: Strong anti-jamming capabilities.
- Сертификатсияҳо: Conforms to IEC 60367 and CE certified.

Расми 2: Visual representation highlighting key features of the TM612, including its dual-channel capability and LCD display.
3. Мушаххасоти
| Параметр | Арзиш |
|---|---|
| Бренд | СИНОТИМЕР |
| Модели | TM612 |
| Диапазони ҳарорат | -20°С то +50°С |
| Таъмини нерӯ | 220В AC |
| Истеъмоли қувваи барқ | 4.5 ВА (максимум) |
| Намоиш | LCD |
| Switching Contact | 1 адад ивазкунанда |
| Барномаҳо | 44 ON/OFF each day or week |
| Гистерезис | 2 sec/day (at 25°C) |
| Фосилаи ҳадди ақал | 1 дақиқа |
| Иқтидор | 16А 250В AC |
| Black-out Memory | 60 рӯз |
| Диапазони вақтсанҷ | 1 дақиқа то 168 соат |
| Батареяи барқгиранда | 3V CR2032 (replaceable) |
| Average Error | 1s/24h (at 25°C) |
| Андозаи маҳсулот (L × В × H) | 87 × 36 × 67 мм |

Расми 3: Diagram illustrating the physical dimensions of the TM612 timer switch.
4. Мундариҷаи баста
Ҳангоми кушодани баста, лутфан тафтиш кунед, ки ҳама ашё мавҷуд аст ва осеб надидааст:
- 1 x SINOTIMER TM612 Two Channel Timer Switch
- 1 x Дастури корбар (ин ҳуҷҷат)
5. Танзим ва насб
The TM612 is designed for 36mm DIN rail mounting. Ensure that installation is performed by a qualified electrician in accordance with local electrical codes and regulations.
5.1 Васлкунӣ
- Locate a suitable 36mm DIN rail within your electrical enclosure.
- Align the timer switch with the DIN rail and press firmly until it clicks into place.
- Ensure the device is securely fastened to prevent accidental dislodgement.
5.2 Ноқилҳо
Refer to the wiring diagram typically found on the device itself or in the included quick-start guide. The TM612 features two independent volt-free relay outputs. Connect the power supply (220V AC) to the designated input terminals (L and N). Connect your loads to the respective output terminals (C1, 1, 2 for Channel 1 and C2, 3, 4 for Channel 2, or similar markings depending on the specific unit). Always ensure power is disconnected before wiring.
5.3 Initial Power-Up and Battery Installation/Check
The device comes with a replaceable 3V CR2032 battery for backup. Upon initial power-up or after a prolonged power outage, the display may be blank or show incorrect time. The battery ensures that programmed settings are retained during power interruptions.
- If the display is blank, ensure the main power supply is connected and stable.
- The internal battery charges when the device is powered. Allow some time for the battery to charge if it's completely depleted.
- To replace the battery, carefully open the battery compartment (usually on the front or side) and insert a new CR2032 battery, observing polarity.
6. Дастурҳои истифодабарӣ
The TM612 is controlled via the buttons located on the front panel below the LCD display. These typically include "Menu", "Res" (Reset), directional arrows (up/down or left/right), and "OK".
6.1 Муқаррар кардани вақт ва рӯзи ҷорӣ
- Press the "Menu" button to enter the main menu.
- Navigate to the "Time Setting" or "Clock" option using the arrow buttons.
- Press "OK" to select.
- Adjust the year, month, day, hour, and minute using the arrow buttons.
- Press "OK" after each adjustment to confirm and move to the next setting.
- Press "Menu" again to exit the setting mode.
6.2 Programming ON/OFF Cycles
The TM612 supports up to 44 ON/OFF programs. Each program can be set for specific days of the week or for daily repetition.
- Press the "Menu" button.
- Navigate to "Program Setting" or "PROG" and press "OK".
- The display will show "1 ON" (for the first ON program). Use arrow buttons to set the desired ON time (hour and minute).
- Press "OK". The display will then show the day selection. Use arrow buttons to select the day(s) for this program (e.g., Mon-Sun, Mon-Fri, Sat-Sun, individual days).
- Press "OK". The display will show "1 OFF" (for the first OFF program). Set the desired OFF time and day(s) similarly.
- Repeat steps 3-5 for additional ON/OFF programs (2 ON, 2 OFF, etc.).
- To exit programming, press "Menu" multiple times until you return to the main display.
6.3 Pulse Program (if applicable)
If your model supports pulse programming (44 memory pulse programs), you can set short duration outputs.
- Enter "Program Setting" as described above.
- Navigate to the "Pulse Program" option.
- Set the start time and duration (1s to 59s) for the pulse.
- Select the day(s) for the pulse.
- Тасдиқ кунед ва бароед.
6.4 Барқароркунии дастӣ
The TM612 typically includes a manual override function, allowing you to temporarily switch the output ON or OFF regardless of the programmed schedule. Look for a button labeled "Manual", "Mode", or similar. Pressing this button usually cycles through AUTO, ON, and OFF modes.
- АВТО: The timer operates according to the programmed schedule.
- ДАР БОРАИ: The output is continuously ON.
- OFF: The output is continuously OFF.

Расми 4: The TM612 timer switch, emphasizing its programmable nature and dual-channel capability.
7. Нигоҳдорӣ
The SINOTIMER TM612 is designed for long-term, reliable operation with minimal maintenance. However, periodic checks can help ensure optimal performance.
- Тозакунӣ: Дастгоҳро тоза ва аз чанг холӣ нигоҳ доред. Барои тоза кардан аз матои мулоим ва хушк истифода баред. Аз тозакунандаҳои абразивӣ ё ҳалкунандаҳо истифода набаред.
- Пайвастшавӣ: Ҳамаи пайвастҳои барқиро мунтазам тафтиш кунед, то боварӣ ҳосил кунед, ки онҳо бехатар ва аз зангзанӣ озоданд.
- Иваз кардани батарея: The internal CR2032 battery has a lifespan and will eventually need replacement. If the display becomes dim or settings are lost frequently during power outages, it may be time to replace the battery. Refer to Section 5.3 for battery replacement instructions.
- Муҳити зист: Ensure the operating environment remains within the specified temperature range (-20°C to +50°C) and is free from excessive humidity or corrosive gases.
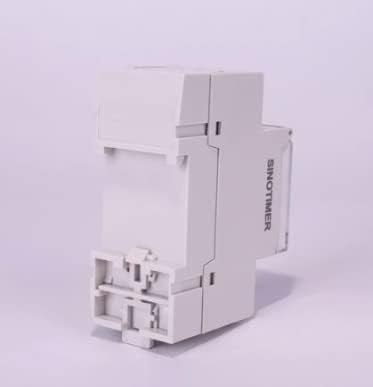
Расми 5: Тараф view of the SINOTIMER TM612, showing its compact design suitable for DIN rail mounting.
8. Баррасии мушкилот
This section addresses common issues you might encounter with your TM612 timer switch.
| Мушкилот | Сабаби эҳтимолӣ | Ҳалли |
|---|---|---|
| Намоиш холӣ аст. | No power supply; depleted internal battery. | Check main power connection. Allow time for internal battery to charge or replace it. |
| Timer not switching ON/OFF as programmed. | Incorrect programming; manual override engaged; incorrect current time/day setting. | Verify program settings (ON/OFF times, days). Check if the device is in AUTO mode (not manual ON/OFF). Ensure current time and day are set correctly. |
| Пас аз хомӯш кардани барқ, танзимот гум мешавандtage. | Internal battery is weak or depleted. | Replace the 3V CR2032 backup battery. |
| Тугмаҳо ҷавоб намедиҳанд. | Хатои муваққатии нармафзор; зарари ҷисмонӣ. | Try pressing the "Res" (Reset) button if available (may require a pointed object). If issue persists, contact support. |
If you encounter issues not listed here or if the suggested solutions do not resolve the problem, please contact SINOTIMER customer support.
9. Кафолат ва дастгирӣ
SINOTIMER products are manufactured to high quality standards. For information regarding warranty coverage, terms, and conditions, please refer to the warranty card included with your product or visit the official SINOTIMER webсайт.
For technical support, troubleshooting assistance, or spare parts, please contact SINOTIMER customer service through their official channels. When contacting support, please have your product model (TM612) and purchase details ready.
расмӣ Webсайт: www.sinotimer.com (Эзоҳ: Ин ҷойнишин аст URL. Please refer to actual product documentation for correct contact information.)