1. Муқаддима
This manual provides instructions for the JLab GO Charge Wireless Mouse. Please read this manual thoroughly before using the product to ensure proper operation and to maximize its features.

Figure 1: JLab GO Charge Wireless Mouse, top view with USB dongle.
2. Мундариҷаи баста
Боварӣ ҳосил кунед, ки ҳама ашё дар баста мавҷуд аст:
- GO Charge Wireless Mouse
- Charging cord (USB-C to USB-A)
- 2.4GHz USB Wireless Dongle
- Дастури оғози зуд
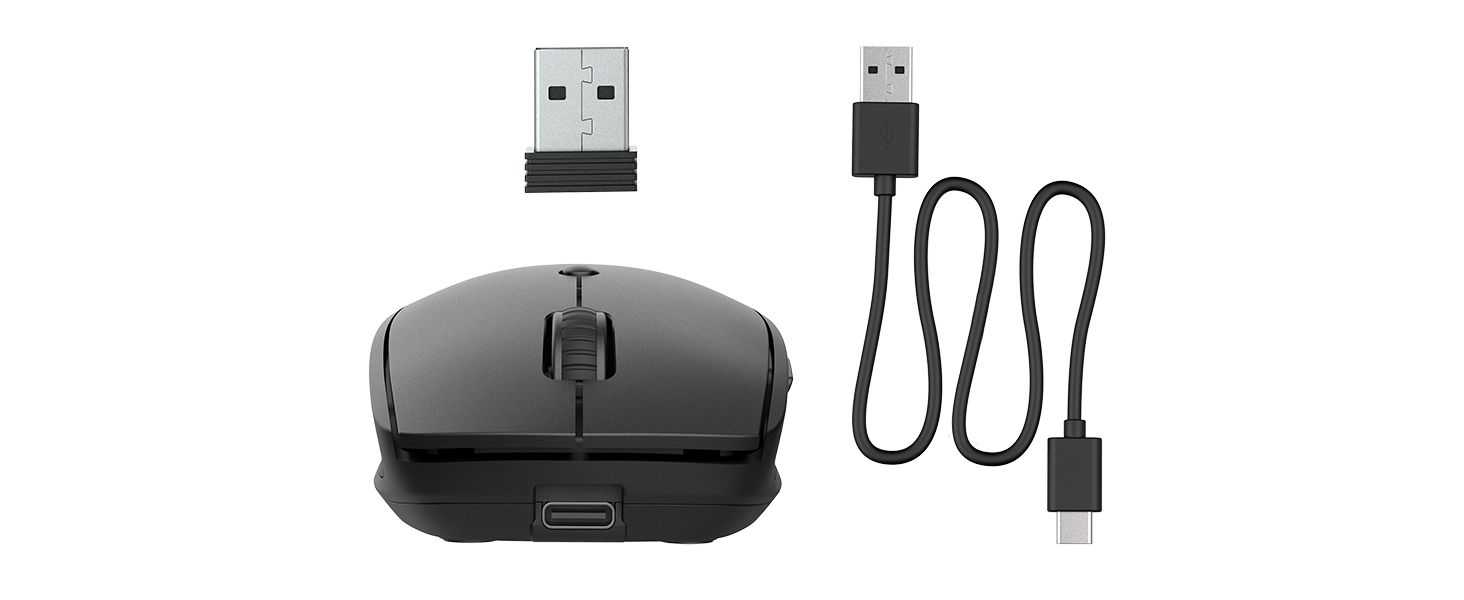
Figure 2: Included components: JLab GO Charge Wireless Mouse, USB-C to USB-A charging cable, and 2.4GHz USB wireless dongle.
3. Танзимот
3.1 Пур кардани муш
The JLab GO Charge Wireless Mouse features a rechargeable battery, eliminating the need for disposable batteries. Use the provided USB-C to USB-A charging cable to charge the mouse. The charging port is located at the front of the mouse.
- Connect the USB-C end of the cable to the mouse.
- Connect the USB-A end to a compatible USB power adapter (not included) or a computer USB port.
- A red indicator light on the underside of the mouse will illuminate during charging and turn off when fully charged.
3.2 Имконоти пайвастшавӣ
The mouse offers two primary connection methods: 2.4GHz USB wireless dongle and Bluetooth.
3.2.1 2.4GHz USB Wireless Dongle Connection
- Locate the USB wireless dongle stored in the compartment on the underside of the mouse.
- Insert the USB dongle into an available USB-A port on your computer.
- Turn on the mouse using the power switch on its underside. The red optical sensor light will activate.
- Муш бояд ба таври худкор ба компютери шумо пайваст шавад.

Figure 3: Underside of the mouse, highlighting the USB dongle storage compartment and the power switch.
3.2.2 Пайвасти Bluetooth
The mouse supports connecting wirelessly to up to two Bluetooth devices.
- Бо истифода аз тугмаи барқ дар паҳлӯи он мушро фаъол созед.
- Press the Bluetooth pairing button (often labeled 'BT1' or 'BT2') on the underside of the mouse. The corresponding LED indicator will blink, indicating pairing mode.
- On your device (computer, tablet, etc.), navigate to Bluetooth settings and search for new devices.
- Select "JLab GO Charge Mouse" from the list of available devices to pair.
- Repeat for a second Bluetooth device using the 'BT2' button if available.
3.3 Multi-Device Toggle
The JLab GO Charge Mouse allows seamless switching between up to three connected devices (one via USB dongle, two via Bluetooth). Use the dedicated toggle button on the underside of the mouse to switch between the paired devices.
4. Истифода бурдани муш
4.1 Вазифаҳои асосӣ
- Клики чап: Интихоби ибтидоӣ ва фаъолсозӣ.
- Клики рост: Ба менюҳои контекстӣ дастрасӣ пайдо мекунад.
- Чархи ҳаракат: Scrolls content vertically. Can also be clicked for middle-click functionality.

Figure 4: Proper hand placement for operating the JLab GO Charge Wireless Mouse.
4.2 Adjustable Tracking (DPI)
The mouse features an adjustable DPI (Dots Per Inch) button, typically located below the scroll wheel. Press this button to cycle through different sensitivity settings, allowing you to adjust the cursor speed to your preference.
4.3 Тугмаҳои канорӣ
The mouse is equipped with side buttons, usually for 'Forward' and 'Back' navigation in web браузерҳо ё file explorers. These can often be customized through your operating system's mouse settings.
5. Нигоҳдорӣ
5.1 Тозакунӣ
To maintain optimal performance, regularly clean your mouse. Use a soft, dry cloth to wipe the surface. For the optical sensor, use a cotton swab lightly dampened with isopropyl alcohol, ensuring no liquid enters the mouse's interior.
5.2 Нигоҳубини батарея
To prolong the life of the internal rechargeable battery:
- Батареяро зуд-зуд пурра холӣ накунед.
- Мушро дар ҷои хунук ва хушк нигоҳ доред, вақте ки дар муддати тӯлонӣ истифода намешаванд.
- Charge the mouse regularly, even if not completely depleted.
6. Баррасии мушкилот
6.1 Муш ҷавоб намедиҳад
- Боварӣ ҳосил кунед, ки муш фаъол аст.
- Сатҳи батареяро тафтиш кунед ва дар ҳолати зарурӣ пур кунед.
- For 2.4GHz connection: Ensure the USB dongle is securely inserted into a working USB port. Try a different USB port.
- For Bluetooth connection: Verify Bluetooth is enabled on your device and the mouse is paired. Try re-pairing the mouse.
- Компютер ё дастгоҳи худро бозоғоз намоед.
6.2 Ҳаракати номунтазами курсор
- Сенсори оптикиро дар поёни муш тоза кунед.
- Боварӣ ҳосил кунед, ки шумо мушро дар сатҳи мувофиқ (масалан, лавҳаи муш) истифода мебаред. Аз сатҳҳои хеле инъикоскунанда ё шаффоф худдорӣ кунед.
- Adjust the DPI setting to a lower sensitivity.
6.3 Масъалаҳои пуркунии барқ
- Verify the charging cable is correctly connected to both the mouse and the power source.
- Порти USB ё адаптери барқро санҷед.
- Боварӣ ҳосил кунед, ки сими пуркунандаи барқ вайрон нашудааст.
7. Мушаххасоти
| Бренд | JLab |
| Модели | GO Charge Wireless Mouse |
| Ранги | Сиёҳ |
| Технологияи пайвастшавӣ | Bluetooth, USB, Wireless (2.4GHz) |
| Технологияи муайянкунии ҳаракат | Оптикӣ |
| Хусусияти махсус | Бесимӣ, барқгиранда |
| Мутобиқати | Mac, Windows, Chrome OS |
8. Кафолат ва дастгирӣ
8.1 Маълумот дар бораи кафолат
JLab products are designed with quality and durability in mind. For detailed warranty information, please refer to the official JLab webсайт ё корти кафолат, ки ба маҳсулоти шумо дохил карда шудааст. Барои даъвоҳои кафолат далели хариди худро нигоҳ доред.
8.2 Дастгирии муштариён
If you encounter any issues or have questions regarding your JLab GO Charge Wireless Mouse, please visit the official JLab support page or contact their customer service. Contact information can typically be found on the JLab webсайт ё дар Дастури оғози зуд.


