1. Муқаддима
Thank you for choosing the ELEGOO Saturn 4 Ultra Resin 3D Printer. This manual provides detailed instructions for the setup, operation, maintenance, and troubleshooting of your new 3D printer. Please read this manual thoroughly before operating the device to ensure safe and efficient use and to achieve optimal printing results.

Image 1.1: The ELEGOO Saturn 4 Ultra Resin 3D Printer with a sampчоп кунед.
2. Маълумот оид ба бехатарӣ
Operating a resin 3D printer involves certain safety considerations. Adhere to the following guidelines to prevent injury and damage to the equipment:
- Ҳангоми кор бо қатрон ҳамеша таҷҳизоти муҳофизатии шахсии мувофиқ (PPE), аз ҷумла дастпӯшакҳо ва айнаки муҳофизатӣ пӯшед.
- Барои кам кардани таъсири буғи қатрон, принтерро дар ҷои хуб вентилятсияшуда истифода баред.
- Keep resin away from direct sunlight and heat sources. Store it in a cool, dark place.
- Do not ingest resin or allow it to come into contact with skin or eyes. In case of contact, wash thoroughly with soap and water and seek medical attention if irritation persists.
- Боварӣ ҳосил кунед, ки принтер дар сатҳи устувор ва ҳамвор ҷойгир шудааст.
- Ҳангоми кор кӯдакон ва ҳайвоноти хонагиро аз принтер дур нигоҳ доред.
- Пеш аз анҷом додани ягон нигоҳдорӣ ё тозакунӣ барқро ҷудо кунед.
3. Дастури насб
3.1. Баровардани қуттӣ ва муайянкунии ҷузъҳо
Ҳама ҷузъҳоро аз бастабандӣ бодиққат хориҷ кунед. Боварӣ ҳосил кунед, ки ҳамаи ҷузъҳои дар поён овардашуда мавҷуданд:
- Принтери ELEGOO Saturn 4 Ultra 3D
- Антеннаи WiFi
- Сохтани судї
- Зарфи қатрон
- Камераи AI
- Табақи қатрон
- Адаптери барқ
- Дастури дастурӣ
- Маҷмӯаи асбобҳо
- Диски USB

Тасвири 3.1: Ҳама лавозимот ва ҷузъҳои дохилшуда.
3.2. Initial Placement and Power Connection
- Place the printer on a stable, level, and well-ventilated surface.
- Connect the power adapter to the printer and then to a power outlet.
- Attach the Wifi antenna to the designated port on the printer.
3.3. Automatic Leveling
The Saturn 4 Ultra features one-touch automatic leveling, eliminating the need for manual adjustments.
- Install the build plate onto the Z-axis.
- Ensure the resin tank is empty or removed during the leveling process.
- On the printer's touchscreen, navigate to the leveling function and initiate the automatic leveling process. The intelligent mechanical sensors will ensure the print platform is perfectly level.

Image 3.2: The automatic leveling mechanism in action.
3.4. Resin Tank Installation and Resin Loading
- Place the resin tank securely onto the printer's LCD screen area.
- Carefully pour the desired resin into the resin tank, ensuring it does not exceed the maximum fill line.
4. Дастурҳои истифодабарӣ
4.1. Интерфейси корбарview
The ELEGOO Saturn 4 Ultra features an intuitive touchscreen interface for easy navigation and control of printing operations.
4.2. Preparing a Model for Printing (Slicing Software)
Before printing, 3D models must be processed using slicing software. Popular options include ChiTuBox. This software allows you to:
- Load 3D models (e.g., .STL, .OBJ fileс).
- Adjust model size, orientation, and position.
- Add support structures for complex geometries.
- Configure print parameters such as layer height, exposure time, and lift speed.
- Slice the model into layers and save it as a printable file (e.g., .CTB, .GOO).
4.3. Интиқол Files
You can transfer your sliced print files to the printer using two methods:
- Диски USB: Insert the USB drive containing your print file ба порти USB-и принтер пайваст кунед.
- Wi-Fi Transfer: The printer supports both 2.4G and 5G networks with transfer speeds of 6-10Mbps. Connect your printer to your local Wi-Fi network and use the compatible software to wirelessly send files.
4.4. Оғози чоп
- Ensure the resin tank is filled and the build plate is leveled.
- Чопи дилхоҳатонро интихоб кунед file from the printer's menu.
- Confirm print settings and press 'Start' to begin the printing process.
4.5. Monitoring Prints with AI Camera and Smart Features
The Saturn 4 Ultra is equipped with advanced monitoring capabilities:
- AI Camera Intelligent Detection: The integrated AI camera provides real-time monitoring of your print status and can detect smart defects. It can also capture captivating time-lapse videos of your creations.

Image 4.1: AI camera monitoring print progress.
- Smart Printing Prompts: Mechanical sensors support foreign object detection to prevent LCD screen damage and resin shortage alarms to enhance print safety and reliability.
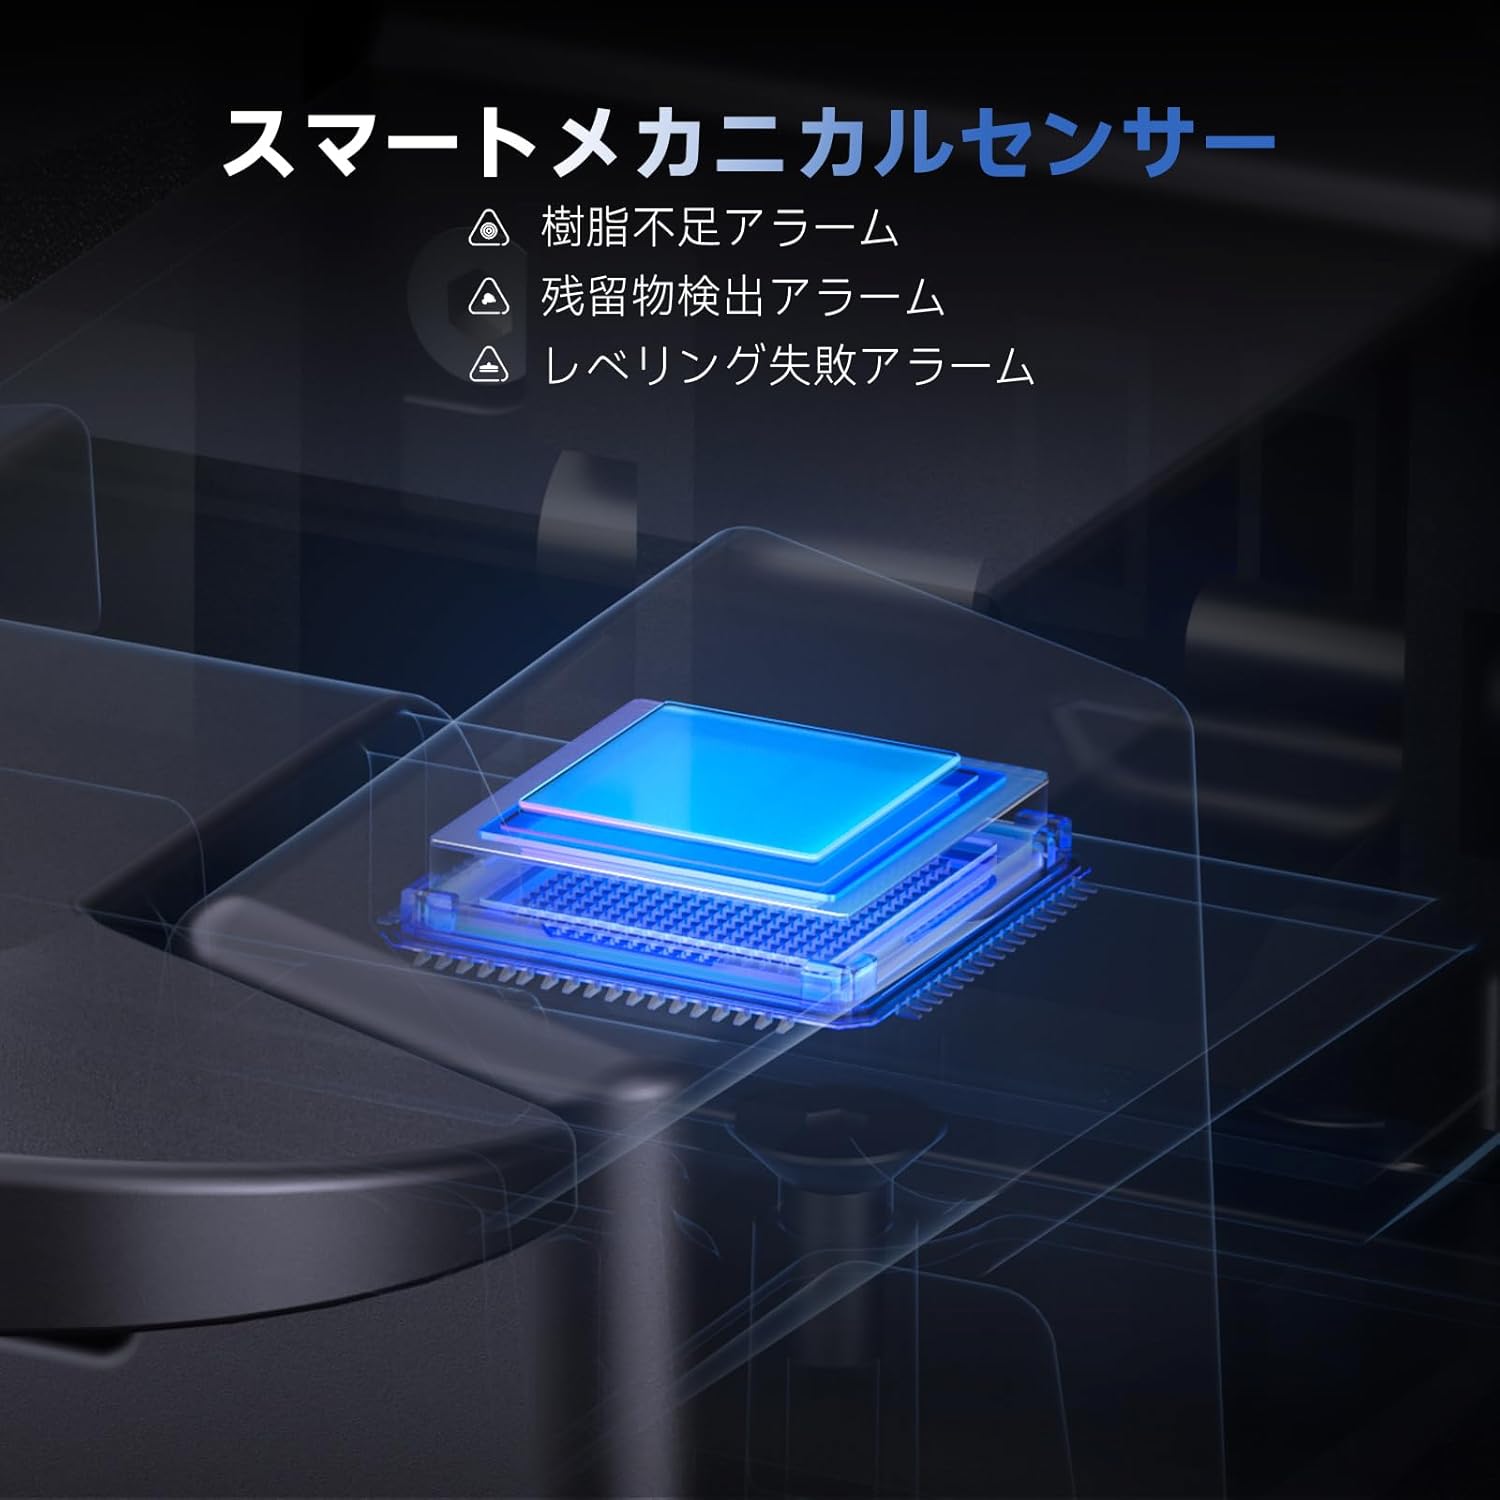
Image 4.2: Smart mechanical sensors for enhanced print safety.
4.6. High-Speed Printing with Tilt Release Technology
The printer utilizes tilt release technology to quickly peel the printed model from the release film, enabling high-speed printing up to 150mm/H. This significantly reduces overall printing time while maintaining quality.

Image 4.3: High-speed tilt release mechanism.
4.7. Print Resume Functionality
Дар сурати пайдо шудани кувваи уtage, the printer can resume printing from where it left off, ensuring uninterrupted print jobs.
4.8. Cluster Printing
The Saturn 4 Ultra supports controlling network printing for multiple printers, allowing you to maximize productivity by managing several print jobs simultaneously.

Image 4.4: Multiple printers engaged in cluster printing.
5. Нигоҳдорӣ
Нигоҳдории мунтазам умри дароз ва кори оптималии чопгари шуморо таъмин мекунад.
5.1. Cleaning the Build Plate
After each print, carefully remove the build plate and clean any residual resin using isopropyl alcohol (IPA) and a soft cloth. Scrape off cured resin with the provided plastic scraper.
5.2. Cleaning the Resin Tank and FEP Film
Periodically clean the resin tank. If there is cured resin at the bottom of the tank, carefully remove it. Clean the FEP film with IPA and a soft cloth. Avoid using sharp objects that could damage the film.
5.3. Printer Exterior Cleaning
Wipe down the exterior of the printer with a soft, damp матоъ. Аз истифодаи кимиёвии сахт худдорӣ намоед.
5.4. Replacing the FEP Film
The FEP film in the resin tank is a consumable part and will need replacement if it becomes cloudy, scratched, or damaged. Refer to the detailed instructions provided in the tool kit or on the ELEGOO support website for replacement procedures.
5.5. Навсозии нармафзор
Check the ELEGOO official website periodically for firmware updates. Keeping your printer's firmware up-to-date can improve performance and add new features.
6. Баррасии мушкилот
Ин бахш масъалаҳои умумиеро, ки шумо ҳангоми кор дучор шуда метавонед, баррасӣ мекунад.
6.1. Common Print Failures
- Failed Adhesion to Build Plate: Ensure the build plate is properly leveled. Increase bottom exposure time in slicing software. Check ambient temperature; resin prints best in warmer environments.
- Warped or Deformed Prints: Increase normal exposure time. Ensure adequate support structures. Check for proper resin mixing.
- Partial Prints or Missing Layers: Verify the print file is not corrupted. Check for foreign objects in the resin tank or damage to the FEP film. Ensure sufficient resin in the tank.
6.2. Error Messages and Alarms
- Resin Shortagҳушдор: Indicates insufficient resin in the tank. Pause the print, add more resin, and resume.
- Муайян кардани ашёи хориҷӣ: The printer has detected an obstruction that could damage the LCD. Remove the resin tank and inspect for any foreign objects on the LCD screen or in the resin.
- Leveling Failure Alarm: The automatic leveling process encountered an issue. Ensure the build plate is correctly installed and there are no obstructions. Re-attempt leveling.
- Temperature Detection Alarm: Notifies if the LED light temperature exceeds the set limit. Allow the printer to cool down. Ensure proper ventilation.
6.3. Масъалаҳои пайвастшавӣ
- Мушкилоти пайвастшавӣ ба Wi-Fi: Ensure the Wi-Fi antenna is securely attached. Verify the printer is within range of your Wi-Fi router. Check network settings on the printer and router.
- USB Drive Not Recognized: Ensure the USB drive is formatted correctly (FAT32) and contains valid print files. Try a different USB port or drive.
6.4. LCD Screen Issues
If the LCD screen is not displaying correctly or has unlit areas, it may indicate a hardware issue. Contact customer support for assistance.
7. Мушаххасоти
| Хусусият | Тафсилот |
|---|---|
| Бренд | ELEGOO |
| Рақами модел | Saturn 4 Ultra |
| Технологияи чоп | MSLA (Masked Stereolithography) |
| Экрани LCD | 10-inch 12K Mono LCD |
| Суръати максималии чоп | 150мм/соат |
| Build Volume (LWH) | 218.88 x 122.88 x 220 мм³ |
| Пайвастшавӣ | USB, Wi-Fi (2.4G & 5G) |
| OS мувофиқ | Windows, Mac OS, Linux |
| Материал | Металл |
| Ранги | Сиёҳ |
| Андозаҳои маҳсулот | 32.9 (D) x 32.7 (W) x 54.8 (H) см |
| Вазни маҳсулот | 14.5 кг |
| Истеъмоли қувваи барқ (режими фаъол) | 180 В |
8. Кафолат ва дастгирӣ
8.1. Маълумот дар бораи кафолат
For detailed warranty information regarding your ELEGOO Saturn 4 Ultra 3D Printer, please refer to the warranty card included with your product or visit the official ELEGOO webсайт. Кафолат одатан нуқсонҳои истеҳсолиро дар шароити муқаррарии истифода фаро мегирад.
8.2. Дастгирии муштариён
If you encounter any issues not covered in this manual or require further assistance, please contact ELEGOO customer support. You can usually find contact information on the official ELEGOO website or through your purchase platform. When contacting support, please have your product model number (Saturn 4 Ultra) and purchase details ready.


